Stunning Wine Bottles Decoration Ideas for Any Event

Ever looked at an empty wine bottle and seen a blank canvas? With a little creativity, those bottles can become stunning centerpieces that tie your whole event together. This guide is all about crafting decor that’s personal, sustainable, and genuinely memorable.
The benefit of this approach is creating a high-end, custom look for everything from weddings to corporate launches, all while keeping your budget in check.
Decorated wine bottles are a fantastic opportunity to get creative and make a statement. Whether you're a DIY bride dreaming of a rustic theme, a brand manager styling a chic product reveal, or an event planner setting the vibe for a festival, upcycled bottles are a secret weapon. They prove you don't need a massive budget to make a big impact.

Using wine bottles for decoration offers significant benefits beyond just their low cost. They provide a unique blend of personalization and scalability, making them perfect for any size event. This method allows for endless creativity while sending a positive, eco-conscious message.
For couples especially, turning empty bottles into unique table decor is a fantastic project. You can find some great inspiration and practical guides for all sorts of DIY centerpiece ideas that will help you nail down a look that’s all you.
The real magic happens when you see how a simple collection of bottles can unify an entire venue. Repeating a color or design across tables, bars, and entryways creates a cohesive, professional look that feels completely custom.
This guide is designed to get your creative gears turning. We'll walk through clear, step-by-step techniques, from elegant painted designs to glowing, flower-adorned installations perfect for any theme.
As you think about these bottle designs, consider how they can work with other decor. To see how these concepts can be elevated into even larger focal points, check out our collection of event centerpieces.
A little bit of prep work is the secret to a smooth, enjoyable crafting session and truly show-stopping results. Let's walk through exactly what you'll need to transform those empty bottles into art. Think of this as your master shopping list, ensuring you have everything you need before you begin.
Before you can get to the fun part, every single bottle needs a thorough cleaning to remove labels and sticky residue. This is the most important step for a flawless, professional finish.
Steps for a Perfect Clean:
To make things easier, here's a listicle to help you match your event's aesthetic with the right materials. This will help you create a focused shopping list.
This table helps you choose a creative path and stick to it for a cohesive, polished final product.
Painting on glass requires specific materials to ensure the paint adheres properly and doesn't chip.
Insider Tip: For a rustic or farmhouse aesthetic, a matte sealant is non-negotiable. It protects your paint job without adding shine, perfectly preserving the soft, weathered look.
Beyond paint, adding texture and light elevates a simple bottle into a breathtaking centerpiece.
For lighting, your choice depends on ease of use and the desired mood.
If you're looking for a one-stop shop, we've curated a collection of high-quality materials perfect for these projects. You can browse our handpicked DIY artist supplies to ensure your decor looks fantastic.
Once your bottles are clean and prepped, the real fun begins. Painting and decoupage are two go-to methods for transforming wine bottles, offering immense creative freedom and a professional finish for any event. The secret to a durable paint job is the prep work—a good primer is absolutely essential.
Painting is the fastest way to completely change a bottle's look to match a specific color palette. The goal is a smooth, factory-like finish.
Steps for a Flawless Coat:
- Prime First, Always: Start with a light, even coat of spray primer made for glass. This gives the surface "tooth" for the paint to grip, preventing chips.
- Pick the Right Paint: For a rustic vibe, use chalk paint. For a sleek, modern aesthetic, choose a high-quality spray paint in a gloss or satin finish.
- Work in Thin Coats: Apply two or three thin coats rather than one thick one. This prevents drips and achieves a smoother result. Let each coat dry completely before applying the next.
This simple workflow shows the three core stages for any bottle project: getting it clean, laying down your color, and adding the final decorative touches.

Following these fundamentals in order ensures a durable, beautiful foundation for your design.
Decoupage is perfect for adding intricate patterns, textures, or custom branding. It involves gluing paper cutouts to a surface smoothly and without wrinkles.
Clear Steps for a Great Decoupage Finish:
- Prepare Materials: You'll need a clean, dry (and preferably painted) bottle, your chosen paper (thin paper, napkins, or tissue paper work best), and a decoupage medium like Mod Podge.
- Apply the Medium: Brush a thin, even layer of decoupage medium onto a small section of the bottle.
- Place and Smooth: Carefully place your paper cutout onto the wet glue. Gently press from the center out to push out any air bubbles or wrinkles.
- Seal Your Work: Once all cutouts are in place and dry, brush a final top coat of your decoupage medium over the entire design to protect it and give it a finished look.
For those tackling more advanced projects, the principles of surface prep and paint application are often universal. You might find some useful tips in our guide on painting techniques for foam core, as many of the same rules apply.
Adding light is one of the easiest ways to turn a simple craft project into a showstopper. Illuminating a wine bottle instantly creates a warm, inviting atmosphere that draws the eye. The benefit is a high-impact look for very little effort. A few clustered together can light up a bar or guide guests along a walkway.

You have two main options for lighting up your bottles, depending on the look you want.
Pro-Tip for Outdoor Events: Create wine bottle tiki torches. With a wick, a copper coupling, and some tiki fuel, you can transform your bottles into stylish torches that look great and help keep bugs away.
This is a simple final assembly step, perfect for when you need to make many decorations.
Steps to Assemble:
The bottle itself affects how the light appears. A clear bottle gives bright points of light, while colored or painted bottles create a moodier, diffused glow.
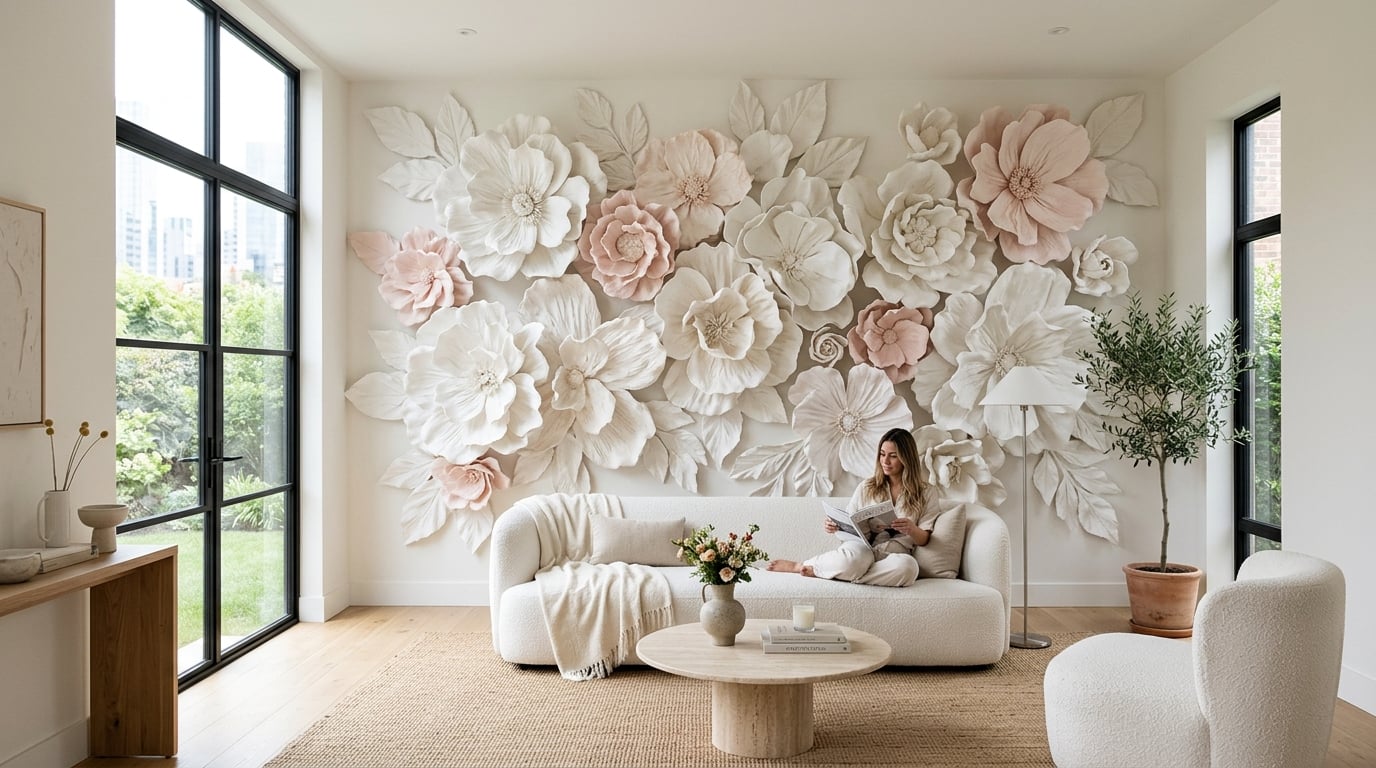
So, you’ve created gorgeous little works of art. Now, let's take them from charming decor to a show-stopping visual experience by pairing them with oversized flowers. This creates a display that doesn't just decorate a space; it defines it.

The global wine bottle market is set to soar past $28 billion by 2028, driven by the demand for aesthetically pleasing bottles. This makes your decorated bottles the perfect companion for another powerful trend: giant flowers. Combining them creates a cohesive theme that feels both personal and luxurious.
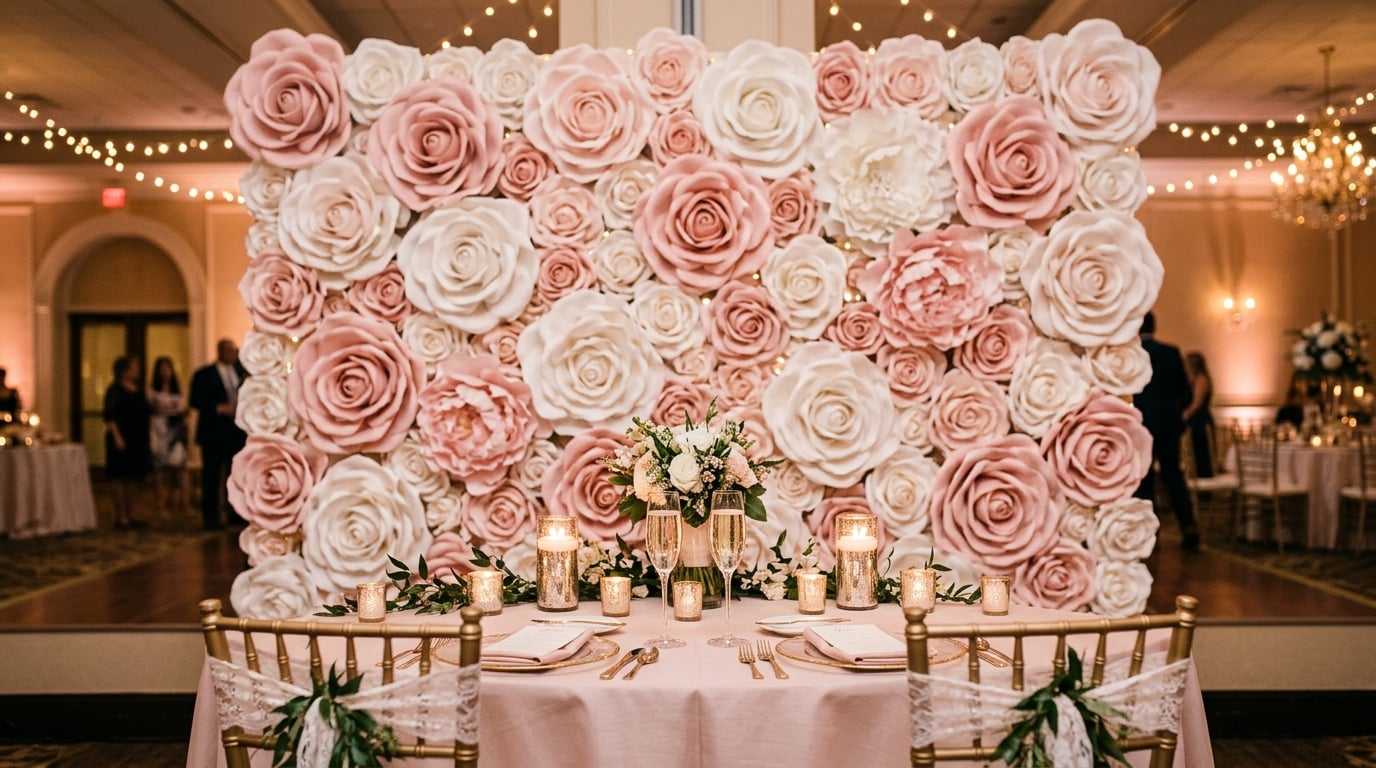
Use Case: Crafting a Breathtaking Sweetheart Table
At a wedding, the sweetheart table is the visual heart of the reception. Using illuminated bottles and giant flowers can turn it into a romantic masterpiece.
Steps to Create the Look:
The benefit here is the dynamic interplay of light and shadow as the soft glow from the bottles reflects off the delicate petals of the giant flowers. It's magical in person and stunning in photos.
In retail, the goal is to stop people in their tracks. A display framing your products with massive, color-coordinated flowers creates a share-worthy moment.
Steps for a Retail Display:
This strategy creates a branded photo opportunity. The scale of the flowers draws people in, encouraging them to take and share photos, effectively turning customers into marketers.
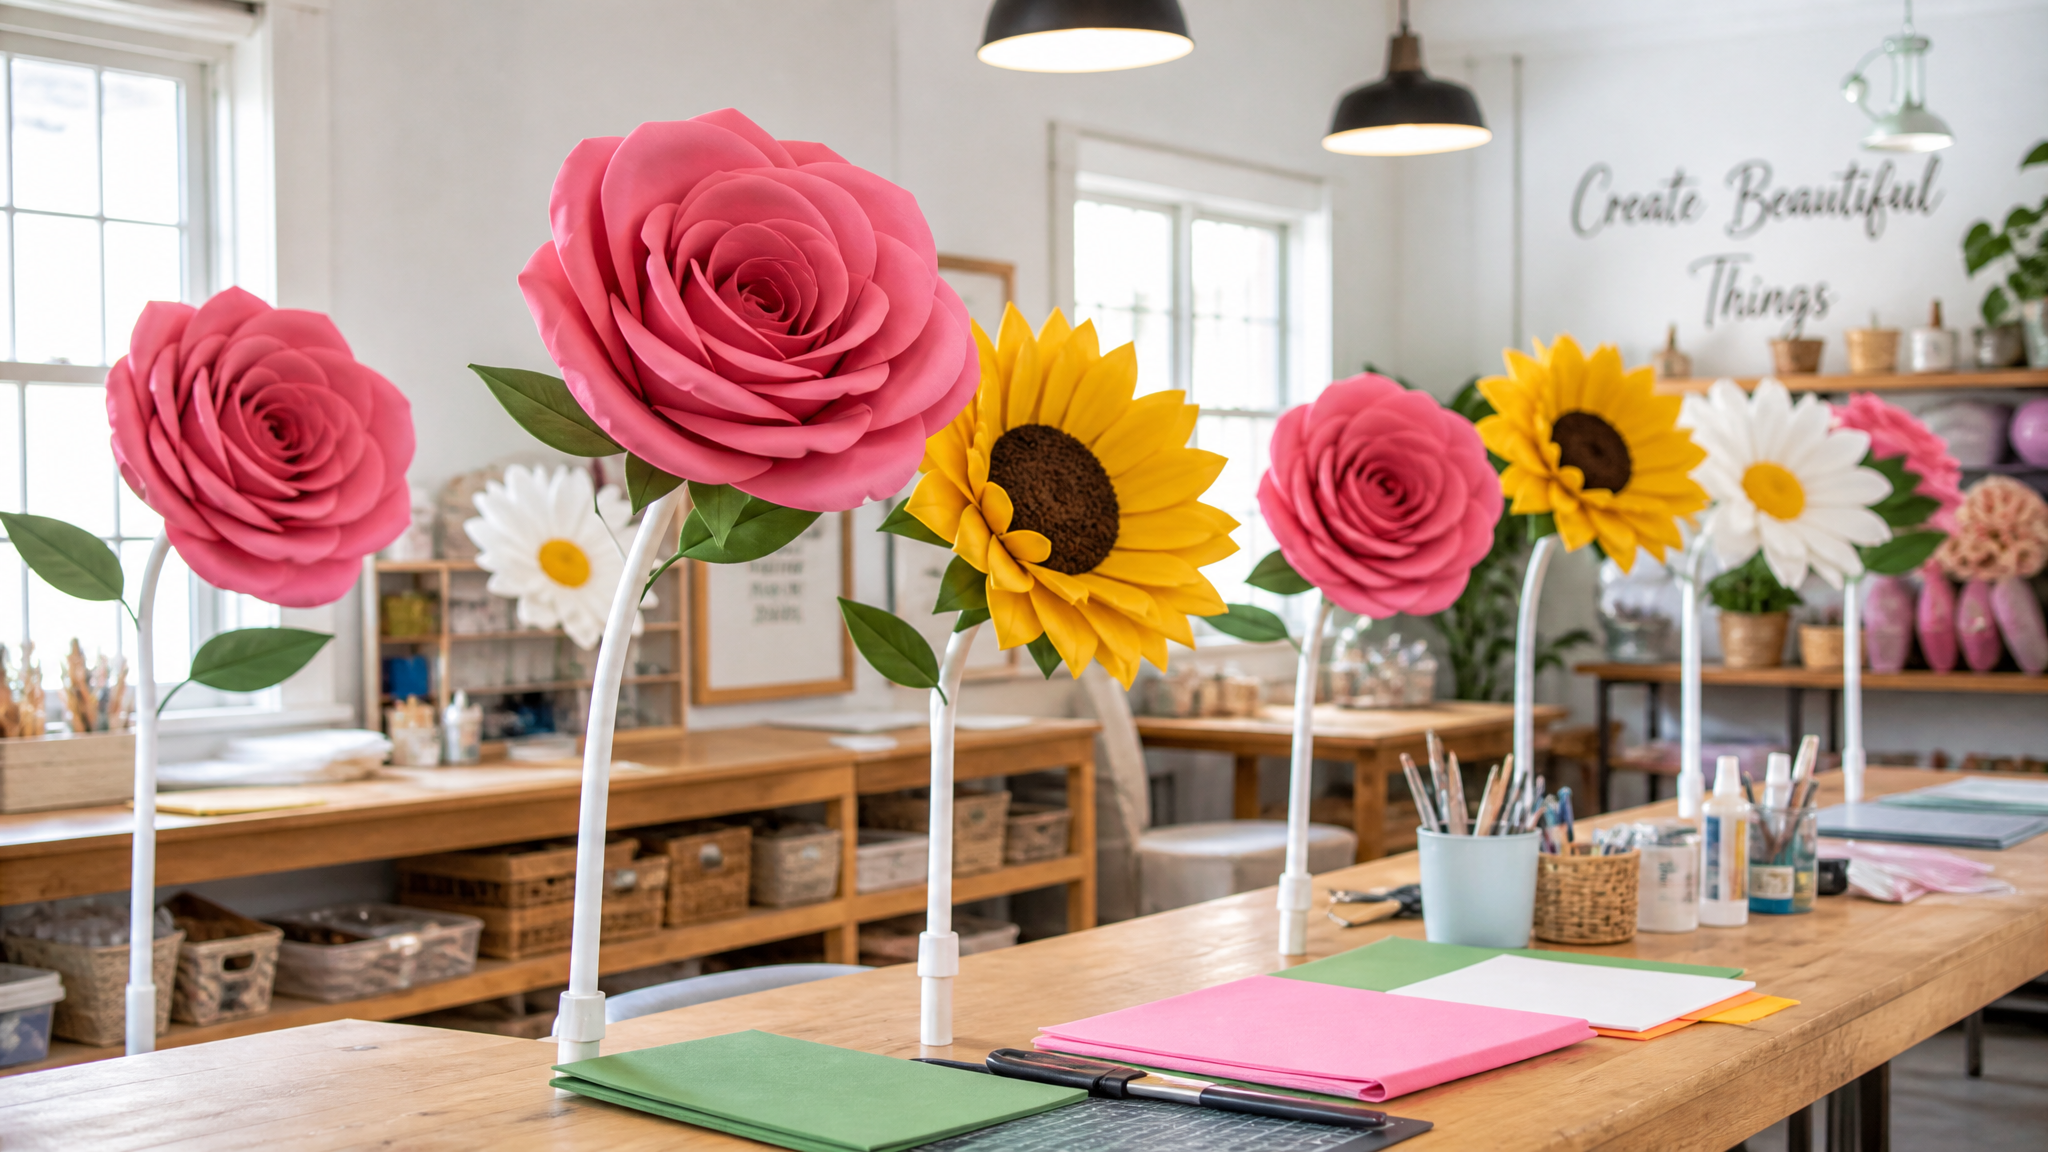
If you’re inspired to build your own oversized blooms, our giant paper flower DIY guide has all the steps you need.
How to Scale Your Decor for Large Events
You've perfected one gorgeous centerpiece, but now you need a hundred. The trick is to shift from a crafter's mindset to a production manager's. You’re not making one item one hundred times; you’re running an efficient assembly line. The benefit of this method is consistency, ensuring every table looks identical to the approved prototype.
To be efficient, break the project into stages and tackle each stage for all bottles at once.
Safe transport is essential to avoid damage. The original cardboard wine cases with built-in dividers are perfect for this.
Steps for Safe Transport:
The global wine packaging market was valued at USD 5.9 billion in 2023, and unique, branded bottles are a fast-growing part of it. Retailers have reported a 30% spike in social media engagement from featuring creative bottle displays, highlighting the commercial benefits.
For more inspiration on making a big impression, check out our guide on impactful corporate event decoration ideas.
Here are answers to the most common questions about wine bottle crafting. Getting these details right from the start will lead to a better outcome.
The most foolproof method is a long soak in hot water with baking soda and dish soap. Let bottles soak for about 30 minutes.
Steps for Stubborn Residue:
- Grab a cloth and a little cooking oil or a dedicated product like Goo Gone.
- Rub the sticky spots until the adhesive breaks down.
- Give the bottle one final wash with soap and water to remove any oily residue before decorating.
What's the Best Kind of Paint for Glass?
For a finish that lasts, you'll want paint designed for glass.
- For Brushing: Use a multi-surface acrylic craft paint.
- For Spraying: Choose a quality spray paint that includes a primer for glass for a super-smooth, durable coat.
A quick but crucial tip: always paint in a well-ventilated space, especially if you're using spray paint. Good airflow is non-negotiable for your safety and helps the paint cure perfectly.
Can I Put Real Flowers in Painted Bottles?
Absolutely! You can use your finished bottles as vases with one critical rule: only paint the exterior. As long as the inside of the bottle is clean, unpainted glass, it's perfectly safe to fill with water for fresh-cut flowers. Paint on the inside can flake off into the water, which is not good for your blooms.
Ready to take your stunning bottle creations to the next level? Imagine pairing them with incredible oversized blooms from Amazing Giant Flowers. You can craft unforgettable, show-stopping displays for any wedding, party, or event. Explore our collection of DIY kits and handcrafted flowers.
Ready to Create Something Amazing?
Browse our collection of giant flower kits and start your next project today.