Building a Flower Chandelier With Bendable Pipe

If you've been doing giant flower installs for a while, you already know that walls and arches are almost too easy at this point. The real flex? A flower chandelier DIY that hangs overhead and stops every single person who walks into the room dead in their tracks. I'm talking about a suspended, three-dimensional floral centerpiece that makes guests tilt their heads back and audibly gasp. That's the energy we're going for.
I built my first hanging flower chandelier for a quinceañera in Katy, TX and honestly? I winged a lot of it. I used floral wire, a prayer, and sheer stubbornness. It held — barely — and I swore I'd figure out a better system. That's exactly how I discovered what bendable pipes can do for overhead installations. They changed everything for me.
This guide is for you if you're already comfortable with giant flower builds and you're ready to take your work into the third dimension. We're going full overhead centerpiece — the kind that photographs from every angle, works for weddings, corporate galas, quinceañeras, and upscale baby showers, and honestly justifies a serious price tag on your quote sheet.
Key Takeaways
Real talk? Most decorators avoid overhead work because it feels complicated. The rigging, the weight distribution, the venue permissions — it's a lot to think about. But that's exactly why mastering it puts you in a completely different category from every other stylist in your market.
When I started offering suspended flower chandeliers, my average booking value jumped significantly. Clients who had been comparing me to three other vendors suddenly stopped shopping around. Because nobody else was offering this. And when they saw it in my portfolio? Sold.
The overhead space above a sweetheart table, a dance floor, or a ceremony altar is the most underutilized real estate at any event. A flower chandelier DIY project that fills that space makes the entire room feel intentional, designed, and luxurious — even if the rest of the décor is relatively simple.
"The ceiling is the fifth wall — and most decorators leave it completely blank. That's your opportunity."
The Role of Bendable Pipes in a Flower Chandelier DIY Build
What Makes Bendable Pipes Different From Other Armature Options
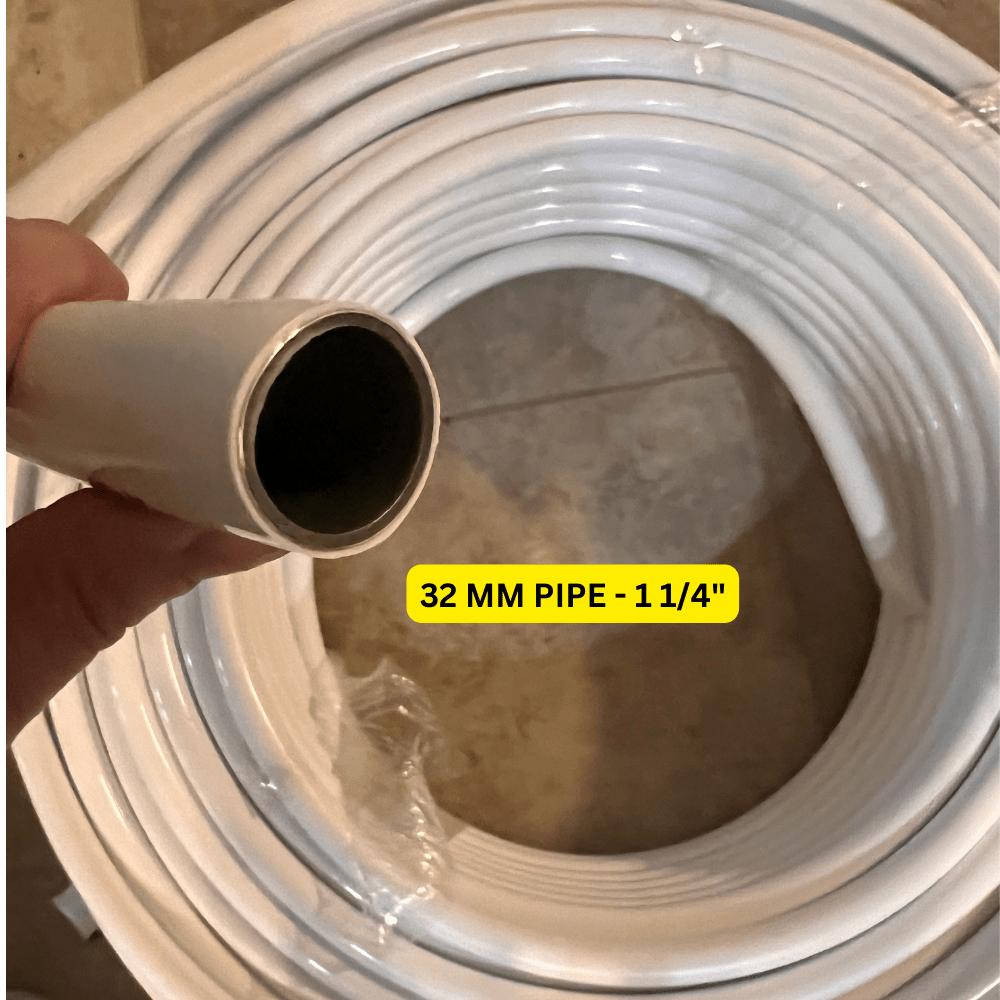
I've tried a lot of things over the years. PVC conduit. Wire mesh. Chicken wire. Wooden dowels. None of them give you the combination of flexibility, rigidity, and reusability that our bendable pipes do.
The key is that these pipes bend to whatever shape you need — curves, arcs, full circles, asymmetric swoops — and then they hold that shape. You're not fighting the material. You bend it once, it stays. And when the event is over, you can reshape it for the next build.
For overhead chandeliers specifically, this matters because you're working in three dimensions. You need arms that curve downward gracefully, a central hub that everything radiates from, and the ability to fine-tune angles on-site without tools. Bendable pipes let you do all of that.
One of the questions I get most from stylists new to overhead work is: "Will it hold the weight of the flowers?" When you're building with EVA foam flowers, you're working with an incredibly lightweight material. A large 18–20 inch EVA foam bloom might weigh 3–4 oz. Even a lush chandelier with 30+ flowers is well within what a properly rigged pipe framework can handle.
The pipes distribute the load across the entire structure rather than concentrating it at one point. That's the difference between a chandelier that hangs elegantly and one that tilts or sags mid-event. Balance and distribution — that's what the framework is doing for you.
💡 Pro Tip
Before you place a single flower, hang your bare pipe framework and let it sit for 30 minutes. Watch for any drift or lean. Correct it at the rigging point before you start loading flowers. It's so much easier to fix the balance when the structure is empty.
Before you touch a single pipe, sketch it out. I know that sounds basic, but trust me — overhead installs punish improvisation. Decide on your diameter (I typically build chandeliers between 36 and 60 inches across for tables), your drop depth (how far the lowest flowers hang below the central ring), and your overall flower count.
Classic chandelier shapes that work beautifully with bendable pipes:
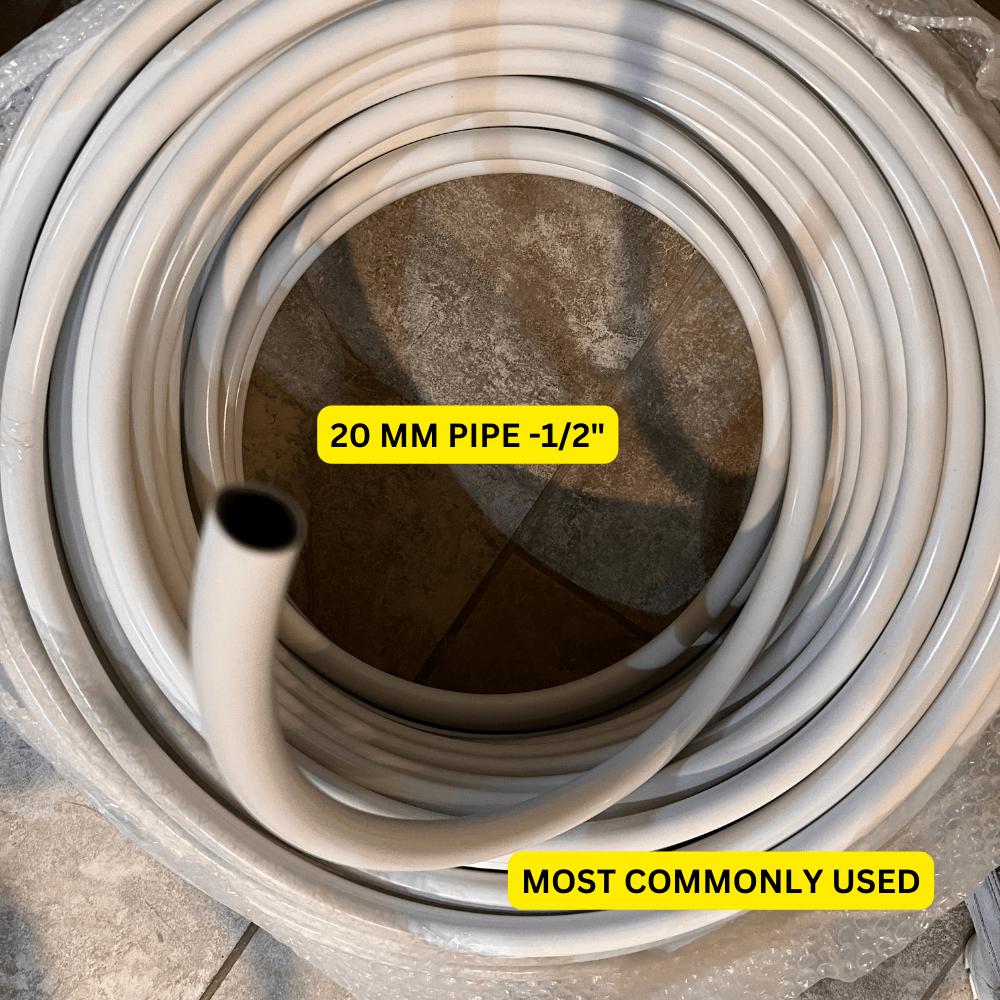
Your central hub is where all the rigging force concentrates, so it needs to be solid. I use a short section of bendable pipe bent into a tight circle (about 6–8 inches in diameter) and wrap the connection point with floral wire before covering with floral tape. This gives you a clean, strong ring to attach your suspension cables to.
From this central ring, your spoke arms will radiate outward. For a 48-inch diameter chandelier, I typically use 8 spoke arms, each about 24 inches long before the downward curve. Bend each arm to curve gently downward at the outer end — this is what gives the chandelier that beautiful crown silhouette.
Step 3 — Attach and Secure the Arms
Each spoke arm connects to the central hub with floral wire, zip ties, or both. I use both. Wrap the connection point tightly, then add a zip tie over the wire for insurance. On overhead installs, redundancy is your friend.
Once all arms are attached, hold the hub up (have a helper do this or use a temporary hook) and check that all arms hang at consistent angles. Adjust by bending — that's the beauty of bendable pipes. You can tweak on the fly.
For larger chandeliers or cascading designs, I add a secondary ring connecting the outer tips of the spoke arms. This creates a perimeter hoop that stabilizes everything and gives you an additional surface to attach flowers. Bend a long pipe section into a circle, connect it to each arm tip, and suddenly your structure feels completely solid.
🌸 Ready to build your chandelier framework?
Shop our Bendable Pipes collection — the structural backbone of every overhead install I build.
I've written about the foam flowers vs paper flowers debate before, and for overhead work, EVA foam wins every time. It's lighter than paper when you're talking about large blooms, it doesn't absorb humidity and get heavy over a long event, and it holds its shape even when hanging at odd angles.
For a statement chandelier, I mix three sizes: large anchor blooms (18–24 inches) positioned at the outer tips of each spoke arm, medium filler flowers (10–14 inches) clustered along the arms, and small accent blooms (4–6 inches) tucked into gaps and used as hanging drops below the main structure.
Attaching Flowers to the Pipe Framework
Each flower gets a wire stem (I use 18-gauge floral wire, twisted and looped through the back of the bloom) that wraps directly around the pipe. For flowers at the outer tips of spoke arms, I wire them facing outward and slightly downward — this is the angle that photographs best from below.
For hanging drops, I use fishing line or thin ribbon attached to small blooms and tied to the outer ring or arm tips at varying lengths — anywhere from 6 to 18 inches below the main structure. This creates that gorgeous cascading effect that makes people think you spent weeks on it. (You didn't. But they don't need to know that.)
Check out my large fabric flower tutorial if you want to mix materials and add some soft textile blooms into your chandelier for texture contrast.
This is the part that separates experienced overhead stylists from everyone else. You must scout the venue ceiling before you design the chandelier. Find out: Is there a structural beam you can rig from? Are there existing rigging points? What's the ceiling height? Is there a venue coordinator who needs to approve overhead installs?
I always ask venues for their rigging policy in writing before I quote an overhead installation. Some venues have load-rated ceiling hooks already installed. Others require you to work with their in-house rigging team. A few prohibit overhead installs entirely. Know before you design.
Hardware and Suspension
For the actual suspension, I use rated swivel hooks at the ceiling connection point (never unrated hardware on overhead work), aircraft-grade cable or heavy-duty fishing line depending on the weight, and a minimum of three suspension points on the chandelier hub for anything over 36 inches in diameter.
Three suspension points create a stable triangle that prevents rotation and tilt. Two points will always want to swing. Four is even more stable for very large builds. Think of it like a camera tripod — three points of contact is the minimum for true stability.
💡 Pro Tip
Always do a full load test at your studio before the event day. Hang the completed chandelier from your rigging hardware for at least 2 hours. Check every connection point. An event venue is not the place to discover a weak joint.
Flower Chandelier DIY: Build Comparison by Style
| Chandelier Style | Pipe Length Needed | Flower Count (Est.) | Build Time | Best For | Difficulty |
|---|---|---|---|---|---|
| Radial Spoke Wheel (36") | ~18 ft | 15–20 blooms | 3–4 hours | Sweetheart tables, intimate dinners | ⭐⭐⭐ |
| Radial Spoke Wheel (60") | ~30 ft | 30–40 blooms | 5–7 hours | Dance floors, ceremony altars | ⭐⭐⭐⭐ |
| Cascading Two-Tier | ~40 ft | 45–60 blooms | 8–10 hours | Galas, luxury weddings, quinceañeras | ⭐⭐⭐⭐⭐ |
| Organic Asymmetric Cloud | ~25 ft | 25–35 blooms | 4–6 hours | Boho weddings, baby showers, editorial | ⭐⭐⭐⭐ |
| Linear Bar (6 ft) | ~20 ft | 20–30 blooms | 3–5 hours | Long banquet tables, corporate events | Ready to Create Something Amazing?Browse our collection of giant flower kits and start your next project today. |