Giant Flower Photo Booth Backdrop: A Complete Guide

You’re probably staring at a blank wall, a mood board, and a deadline. The client wants a photo moment people will line up for. You want something that reads polished in person, looks good on camera, and doesn’t turn into a floppy craft project halfway through the event.
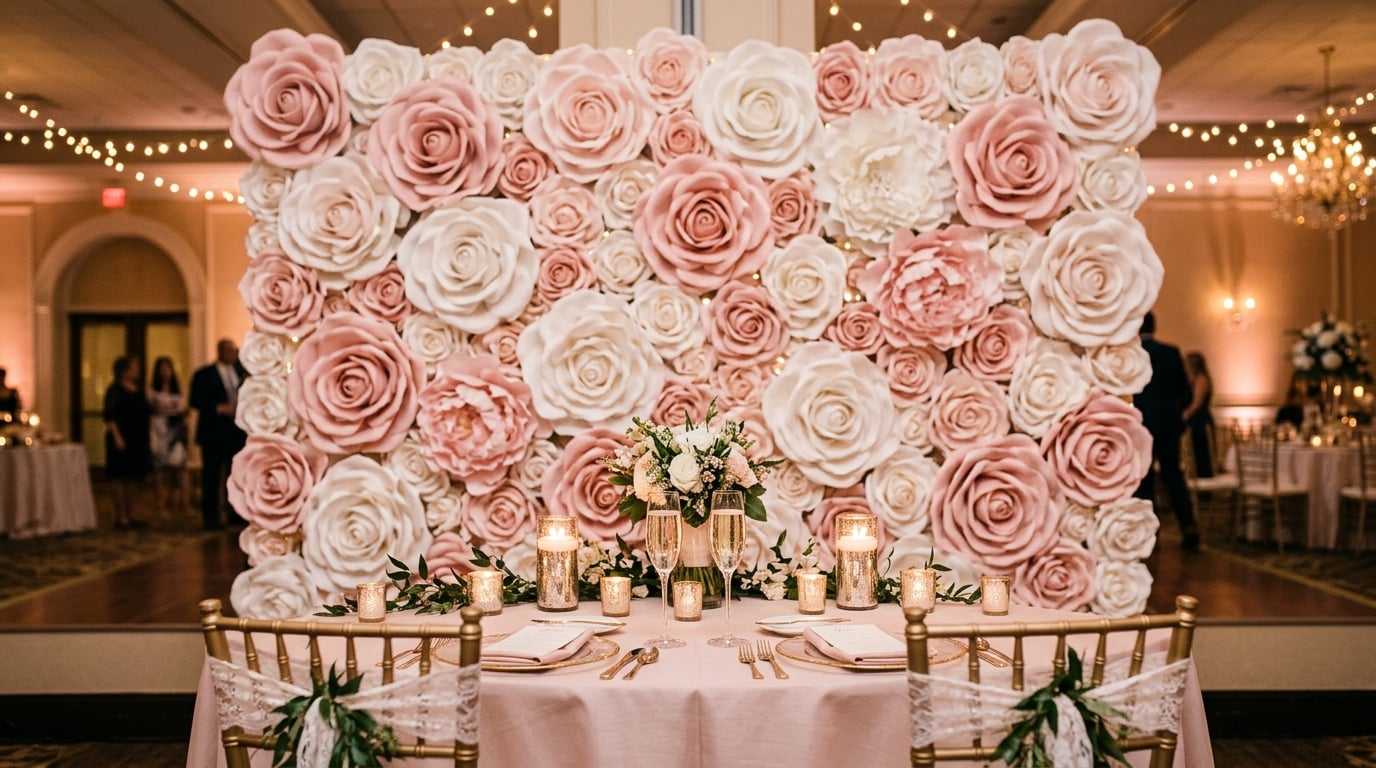
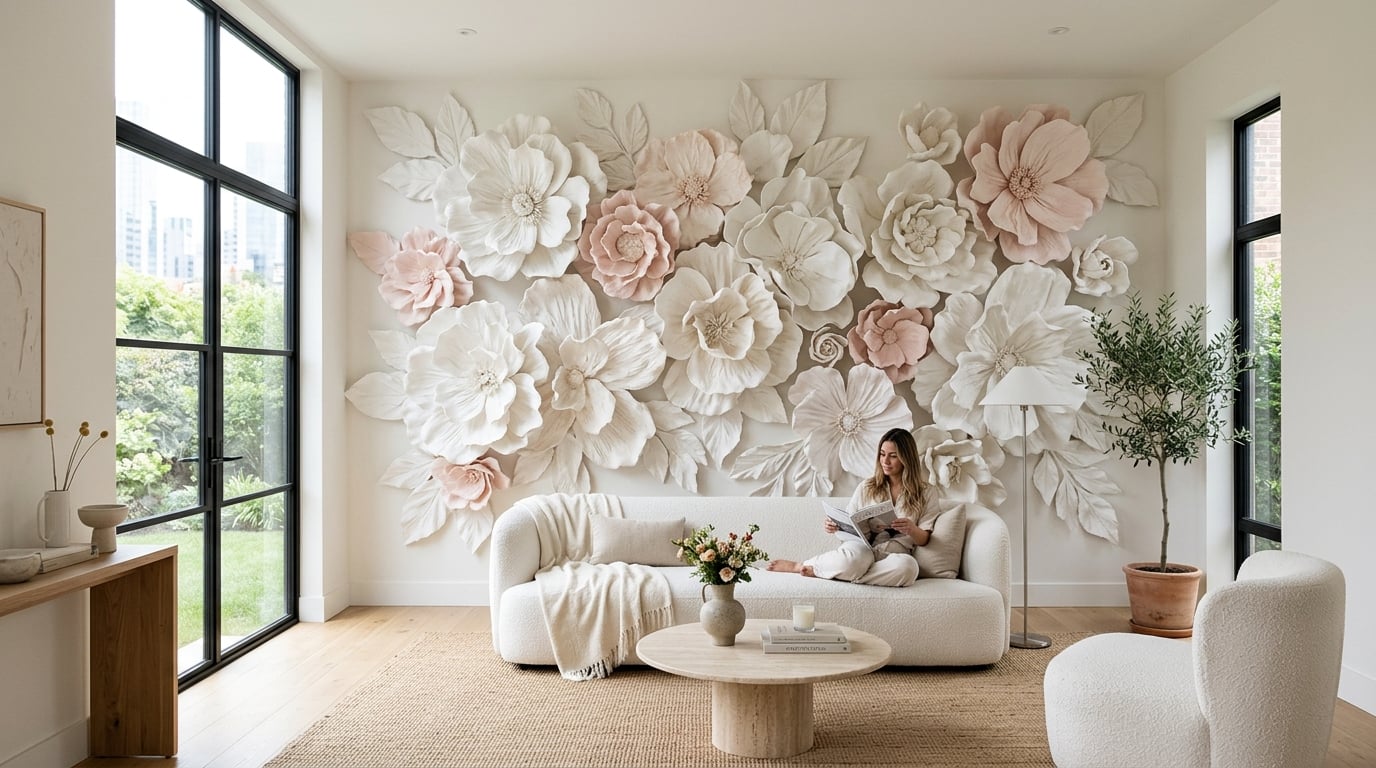
That’s where a giant flower photo booth backdrop earns its keep. It can soften a hard venue, carry a color story, frame brand photography, and give guests a reason to stop and post. The trick is that these backdrops only work when the planning, build, install, and lighting all support each other. A beautiful flower wall can still fail if the scale is off, the mounting is weak, or the photos come out shadowy.
I’ve seen the same pain points over and over. Teams underestimate flower count. They choose materials that look fine on a worktable and collapse on site. They focus on making flowers, then forget the selfie angle, the standing distance, or where the queue will form. Good results come from treating the backdrop like part scenic build, part guest experience, and part marketing asset.
A planner has one week, a venue wall that looks bigger in person, and a client who wants guests posting photos before dessert. The backdrop decision made on day one usually determines whether install day feels controlled or chaotic.
Start by defining the job the backdrop needs to do. A giant flower photo booth backdrop for a wedding ceremony, a sponsor wall, a retail window, and a high-volume brand activation may all use oversized blooms, but they do not use them the same way. Guest traffic, camera distance, brand visibility, teardown rules, and labor all change the build.
The category took off because planners and crafters could finally make a statement piece without full scenic-shop pricing. Social media pushed it further. Once oversized paper florals proved they could read well on camera, they became a repeat request for weddings, launches, showers, store displays, and pop-ups.

Start with purpose, not petals
Flower style comes later. First decide what success looks like.
If the backdrop is mainly decorative, you can prioritize color, softness, and visual fullness. If it needs to pull people into a photo area, support sponsor visibility, or carry a campaign look, planning gets stricter fast. Flower size, negative space, logo placement, standing distance, and lighting all need to be resolved before anyone starts cutting petals.
Use this filter before choosing materials or flowers:
One practical test works every time. Stand six to eight feet back and ask whether a guest can tell where to stand, where to look, and what the focal point is within a few seconds. If not, the backdrop needs a clearer composition.
This choice decides your schedule as much as your budget.
A DIY build makes sense when labor is available, the finish can be slightly handmade, and there is time to test adhesives, flower scale, packing, and setup. Custom is usually the safer route when the install has to match brand colors closely, survive transport, and look polished from every angle without a lot of troubleshooting on site. Pre-made units sit in the middle. They save time, but they rarely fit a specific venue or campaign perfectly.
| Route | Best for | Trade-off |
|---|---|---|
| DIY build | Budget-sensitive teams, stylists, crafters, low-stakes installs | More labor, more testing, more install risk |
| Custom installation | Brand activations, luxury weddings, retail, corporate events | Higher spend, but less guesswork |
| Pre-made unit | Fast deployment, simple visual impact | Less tailored to theme or brand |
If you’re still sorting through formats, this gallery of photo booth backdrop ideas and event applications helps narrow the visual direction before you choose whether to buy, build, or commission.
Another shortcut. If the event already includes custom signage, step-and-repeat graphics, or branded panels, compare the flower backdrop against your other display costs, not against craft-store supply costs. That puts it in the right category. For many brand teams, flowers compete with large format print media, not with table decor.
For branded events, the wall has to do more than look attractive in the room. It needs to photograph well under mixed lighting, carry the brand without feeling like a trade show panel, and hold up through dozens or hundreds of guest interactions.
Analysts cited in Lovely Indeed’s roundup discussing floral photo moment performance pointed to stronger social sharing from floral selfie walls than from standard photo booths. That tracks with what I’ve seen on site. Guests approach flower backdrops more casually, groups can fit into the frame more easily, and the photos feel less transactional.
That’s why the buy-versus-build decision goes beyond material cost. It affects brand accuracy, setup time, photography results, and whether the backdrop keeps earning attention after the event through reposts, tags, and campaign images.
The Custom Order Route A Professional Solution
When the install has to be right the first time, custom usually wins. That’s especially true when the backdrop is tied to a product launch, sponsor wall, luxury wedding stage, or retail window where visual consistency matters more than craft satisfaction.
The market already reflects that split. Giant flower backdrops now fall into three main segments: pre-made commercial units, DIY kits, and custom handcrafted installations for premium events, with custom growing as brands push for unique, Instagram-worthy experiences tied to specific marketing goals, according to this overview of the giant flower backdrop market segments.

Custom ordering removes the parts of the job that usually go sideways:
A smart custom process usually starts with references, dimensions, venue notes, and brand direction. Then the maker translates that into a mockup, flower mix, mounting strategy, and shipping plan.
Custom isn’t about avoiding work. It’s about protecting outcomes.
It’s the better path when:
- The event is high stakes: Product launches, executive appearances, press previews, and sponsor-facing events leave no room for visual drift.
- The backdrop must match other scenic elements: If flowers sit beside signage, stage graphics, or rigid panels, the build needs to look intentional, not improvised.
- Load-in time is tight: A compressed setup window punishes anything that requires on-site crafting or redesign.
For teams pairing floral work with brand graphics, printed logos, or scenic panels, it helps to understand how floral installations interact with large format print media so the entire photo zone feels cohesive rather than split between two visual languages.
A custom backdrop works best when the flowers, signage, and camera angle are designed together, not added one after another.
A good vendor conversation is specific. Skip vague questions like “Can you do something elegant?”
Ask for:
One practical option in this category is custom giant flowers for events, which are made to suit branded activations, weddings, retail displays, and other made-to-measure event applications.
The primary advantage of custom is predictability. You’re buying fewer surprises.
DIY makes sense when you have more labor than budget, when the event style suits a handmade look, or when you need flexible creative control. It also works well for stylists, makers, and small event teams who can prep in advance and test the install before show day.
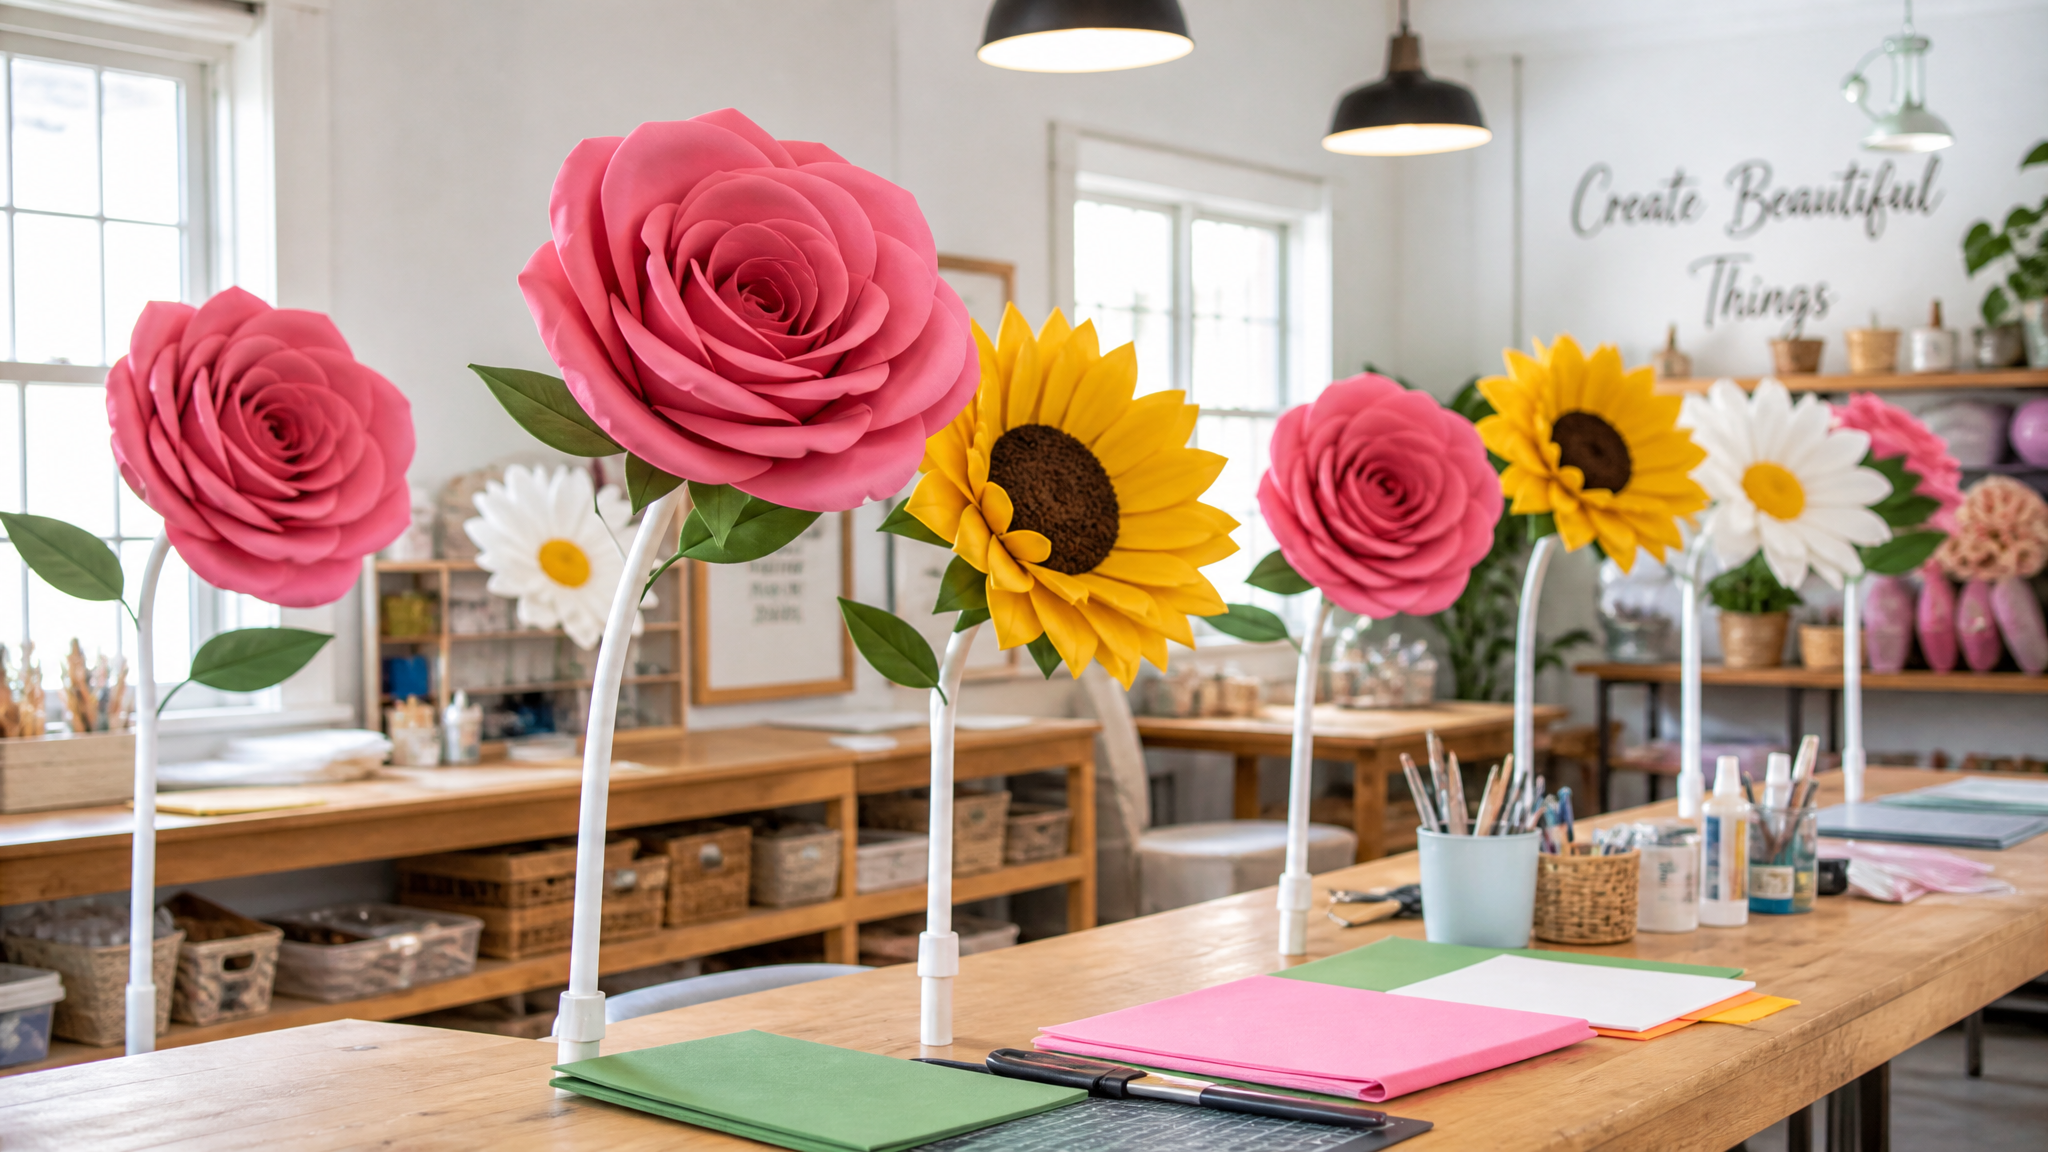
For a standard 8x8 ft backdrop, plan on 10 to 15 flowers. Using butcher paper for petals, 12 to 16 gauge floral wire, and crepe paper for stamens, a full backdrop can be built in 4 to 6 hours for under $50, based on this photo booth backdrop build guide.

Don’t overcomplicate the supply list. Most bad DIY results come from poor material choices, not lack of effort.
Use:
If you want a shortcut into templates, components, and process references, this giant paper flower DIY resource is one way to reduce trial-and-error before cutting your full batch.
Don’t make one flower at a time from start to finish. Batch the process. It’s faster and the wall looks more cohesive.
Cut all petals first. For large flowers, keep shape families consistent so the wall reads intentional from a distance.
A simple rhythm works well:
Pre-curling matters because flat petals read dead on camera. You want contour, not just diameter.
Build the stamen cluster separately. Wrap and secure it before petals go on.
That gives you a firm core, which makes the rest of the flower easier to balance. Weak centers create twisting and tilt once the flower hangs.
Build note: The center is the anchor point. If it’s soft or loose, the whole flower looks tired no matter how nice the petals are.
Layer petals around the center and vary the opening of each bloom. If every flower opens at the same angle, the backdrop looks stamped out.
Aim for a mix of:
The point isn’t botanical realism. The point is visual rhythm.
Here’s a quick visual tutorial format that helps many first-time makers understand layering and shaping before they start their production run:
The strongest DIY walls usually share the same habits.
What works
- Limit the palette: Two or three tones plus a center color look cleaner than a rainbow wall.
- Mix sizes on purpose: Slight variation keeps the surface from looking grid-like.
- Build extra flowers: A few spares solve transport crushes and install gaps.
- Test one full cluster first: Don’t cut an entire set before proving the look at scale.
What doesn’t
DIY is worth it when you control your prep time and accept that some of the finish comes from process discipline, not inspiration.
Load-in is where a flower wall either proves itself or turns into a repair job. A backdrop can look great on the studio floor and still fail once it is upright, under venue lights, and surrounded by guests who lean, brush past, and pull friends into frame.
Older DIY methods often relied on floral wire, masking tape, and a forgiving wall surface. That can hold for a short home setup. It is a weak plan for a hotel foyer, trade show booth, or any event where the backdrop has to stay clean, stable, and photo-ready for hours.
Mounting method affects almost every build decision. Flower size, backing weight, stem length, packing method, and install time all change once you know whether the piece will hang on a wall, clip to a frame, or stand on its own.
Here are the setups I use most often:
Mounting method Best use Watch out for Backdrop stand or pipe system Portable event setups, rentals, photo zones Needs ballast, level feet, and balanced flower placement Direct wall mount Venues that allow surface-safe attachment Surface testing and removal rules matter Suspended install Overhead clusters, immersive entries Rigging approval, lift access, and sightlines need advance planning Freestanding stem structure Sculptural displays, layered selfie stations Base weight matters more than petal finish If the design includes oversized stems or freestanding flowers, these bendable PVC pipes for giant flower stems are the type of structural parts often used to create height and controlled curve without relying on the wall alone.
Ask these before anything leaves your worktable:
That last point affects more than comfort. If the wall sits in a shallow corridor, guests crowd the flowers, faces fall into shadow, and the backdrop photographs larger than the people it is supposed to frame. Good planning runs from structure to final photo use, especially if the setup is meant to generate branded content all night.
Weight distribution comes first. A common mistake is loading the top corners with the biggest flowers because that is where the composition looks dramatic on paper. On site, that creates twist, sag, or a stand that never feels fully settled.
Use attachment redundancy. If I mount a large hero bloom, I want a primary connection and a secondary one. Adhesive can soften under heat. Velcro can release from dusty surfaces. Zip ties can slip if they are attached to a weak crossbar. One backup point buys time before a visible failure.
Test every material on the actual surface. Painted drywall, polished panels, window glass, pipe and drape, and grass walls all respond differently. What held perfectly in the workshop may peel in ten minutes at the venue.
Keep the guest side clean. Trim wire ends, hide tape, and check for hooks that can catch sleeves, sequins, handbags, or signage cables.
Safety trade-offs planners often miss
Freestanding pieces save the venue wall, but they need heavier bases and more floor space. Direct wall mounting can look cleaner in photos, but only if the venue allows proper attachment and removal. Suspended work opens up dramatic design options, but the approval process is slower and labor costs rise fast.
Outdoor use changes the whole calculation. Paper flowers and lightweight foam blooms can survive a calm setup window, but wind will rotate stems, crush petals, and stress every connection point. For exterior events, fewer flowers on stronger anchor points usually outperform a dense wall packed for indoor conditions.
Do one last walk-through from the spot where guests will stand, not from six inches away with your hands still on the frame.
Check for:
If the structure shifts when lightly tapped, fix it before the room opens. Guests will test a backdrop harder than your install crew does. A safe, stable mount protects the design work, the venue relationship, and the photo results that justify the build in the first place.
The build can be excellent and the photos can still disappoint. Most of the time, the problem isn’t the flowers. It’s lighting angle, guest position, or visual clutter around the booth.
A giant flower photo booth backdrop needs camera space as much as it needs flowers. Leave enough room in front of it for solo shots, pairs, and small groups. If guests are pressed against the wall, faces flatten and petals create hard shadows behind heads.
Light for faces first
People forgive a slightly imperfect flower. They don’t forgive unflattering photos.
Use this order of priorities:
If you can choose between dramatic mood and usable guest photos, choose usable. The backdrop’s job is to be photographed.
The best selfie stations don’t stop at the flower surface. They frame the guest experience from approach to pose.
Add supporting elements carefully:
For broader concept ideas on guest flow, posing prompts, and themed stations, this set of selfie station ideas for events is a good reference.
If the backdrop is doing all the visual work, keep props minimal. If the flowers are simpler, let the styling carry more of the story.
People want a good photo but don’t want to feel managed. A few subtle cues fix that.
Try these:
For event teams, one staff member near the station can make a huge difference. They don’t need to run a booth. They just need to invite, position, and keep the line moving.
Good backdrop photography comes from simple discipline. Light faces evenly, keep the floor zone clean, and make it obvious where the shot happens.
Transport problems usually start before the van is loaded. If a flower was built as a single oversized piece, it needs dedicated space, not the leftover gap between pipe, drape, and catering bins.
Pack with shape in mind, not just speed:
For long drives or multi-stop event days, modular panels and detachable blooms are easier to move, quicker to patch, and far less stressful for the install team.
They can last well beyond one event, but only if the material matches the job.
Paper flowers work well for indoor launches, baby showers, weddings, and one-day brand activations where the backdrop stays dry and staff can control guest contact. They photograph beautifully, but rough handling, moisture, and repeated compression shorten their life fast.
Foam flowers usually hold up better for repeated installs, travel, and busy photo moments where guests brush against the wall. The trade-off is finish quality. Cheap foam cuts and thick edges show up on camera, especially under side lighting. If reuse matters, I would rather build fewer high-quality flowers than store a large batch of damaged ones that need rebuilding before every event.
What’s the best way to store them after the event
Storage is where the buy versus build decision keeps paying off, or stops making sense.
Teams that plan to reuse backdrops need a storage method before the event date, not after breakdown when everyone is tired and rushing. Upright storage is usually safest because it protects depth and petal shape. Flat bins save floor space, but they also flatten the pieces you spent the most time shaping.
Use a simple system:
A reusable flower wall is only as practical as the way it is packed, stored, relit, and photographed the next time it comes out. That is why smart planning goes past the build itself. It includes transport, labor, touch-up time, and whether the backdrop still looks strong enough on camera to justify using it again.
If you need either a custom-built installation or a DIY path with craft supplies and training support, Amazing Giant Flowers offers oversized floral backdrops, event flowers, and maker-focused resources for planners, stylists, and crafters building photo-ready displays.

Ready to Create Something Amazing?
Browse our collection of giant flower kits and start your next project today.