Bendable Pipes for Arches and Garlands: A Builder's How-To
Key Takeaways
If you've ever tried to build a giant flower arch and ended up with something that looked more like a sad drooping noodle than a gorgeous floral statement piece — girl, I've been there. That's exactly why I became obsessed with bendable pipes for arches and garlands. They are, hands down, the secret weapon that separates a wobbly DIY disaster from a display that looks like it belongs on a magazine cover.
I'm Adriana, and I've been building giant flower installations out of my Houston studio for years. I've wrestled with PVC, I've tried wire frames, I've hot-glued things to chicken wire at midnight before a wedding. And when I finally started working with proper bendable pipes? Everything changed. The shapes I could create, the stability, the ability to reuse the same structure for three different events — it was a total game changer.
So today I'm walking you through everything I know. How to bend them, how to plan your shapes, how to build arches and garlands that actually hold up — and how to stop wasting money on structures that fail you mid-event. Let's get into it.
Let me paint you a picture. You've spent hours making the most stunning giant foam roses. They're perfect. And then you realize you have no idea how to actually hold them up in an arch shape without the whole thing collapsing.
That's the problem bendable pipes solve.
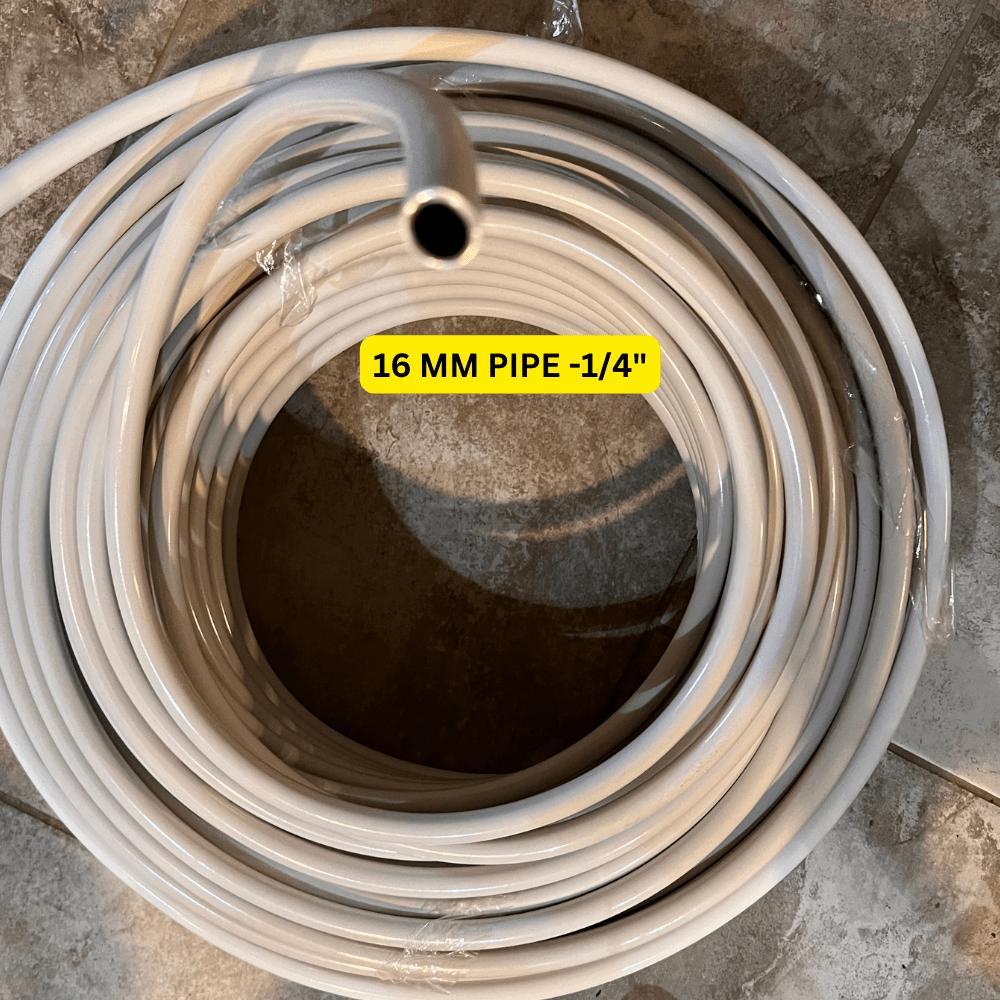
These are flexible structural pipes — think of them like a heavy-duty pipe cleaner for grown-ups — that you can bend into any curve, angle, or shape you need. They hold their position once bent. No springing back. No drooping. You shape it, it stays shaped.
What Makes Them Different From Regular PVC or Wire?
Regular PVC is rigid. You need special fittings and connectors just to make a curve, and even then, you're locked into that one shape forever. Wire is flexible but flimsy — it won't support the weight of foam flowers without sagging under the load.
Bendable pipes hit the sweet spot. Sturdy enough to hold weight. Flexible enough to shape by hand. Durable enough to use again and again. I've used the same pipes for a bridal shower arch, then reshaped them into a garland swag for a corporate event, then bent them into a half-moon backdrop frame. Same pipes. Three completely different looks.
If you're making giant paper flowers, foam flowers, or fabric blooms for any kind of display — arches, garlands, backdrops, hanging installations — you need bendable pipes in your supply kit. Full stop.
Event crafters, wedding decorators, party stylists, prop makers, photo booth builders. If you're building anything structural with flowers, this is your material. I'd honestly recommend them to anyone who has ever lost sleep over a collapsing structure the night before an event.
I know some of you are thinking — can't I just use wire? Or PVC? Let me break down exactly why bendable pipes are my go-to, and when other materials might (rarely) make sense.
Honestly? For 95% of what we do as event crafters, bendable pipes win every single category that matters. The reusability alone pays for itself after two or three events. I've had pipes that have been reshaped and reused over a dozen times without losing their structural integrity.
Ok, real talk — the biggest mistakes I see crafters make happen before they even touch the materials. Planning is everything. So let me walk you through how I approach a new build.
For a standard wedding arch, you're typically looking at 8 feet tall by 6–8 feet wide. For a photo booth backdrop, maybe 7 feet tall by 5 feet wide. For a garland swag above a table, you might need 10–12 feet of length with a gentle curve.
Write these numbers down. Sketch a rough shape on paper. It doesn't need to be pretty — it just needs to give you a reference point so you're not guessing while you're building.
Step 2: Decide on Your Shape
Bendable pipes for arches and garlands can go in so many directions. Here are the shapes I build most often:
Each shape has its own bending strategy, and I'll cover the main ones below.
A standard full arch usually takes 2–4 bendable pipes depending on the diameter of the arch and how you're connecting them. A long garland might need 4–6 pipes linked together. Always buy a couple extra — you'll thank yourself later.
💡 Pro Tip
Lay your pipes out on the floor before bending and trace your desired shape with chalk or tape. Then bend the pipe to match the outline. This is the fastest way to get a symmetrical arch on your first try — and it saves you from the frustration of a lopsided build.
This is where it gets really fun. Building an arch from scratch feels so satisfying, especially when you see those flowers go on and the whole thing comes together.
No heat required. No special tools. You literally bend the pipe with your hands.
Start at the center of the pipe for the top of your arch. Apply slow, even pressure as you curve outward toward each leg. The key word is slow. If you rush it, you can get kinks or uneven curves. Take your time, step back, check the shape, adjust.
For a full semicircle arch, I like to work from the center outward in small increments — bend a little, check, bend a little more. You'll get a feel for it quickly, usually within the first 10 minutes of working with a new pipe.
Connecting Multiple Pipes
When your arch is wider or taller than a single pipe length, you'll need to connect two pipes. Overlap them by about 6 inches and secure with floral wire or zip ties. Then bend the joined section gently to blend the connection into your curve. The overlap point becomes completely invisible once flowers are attached.
For a very large arch — say, 10 feet wide — I sometimes use three pipes total: two for the legs and one bent specifically for the crown of the arch, all overlapped and wired together at the joints.
This is the question I get asked constantly: how do I make it stand up on its own? The legs of your arch need to go into a base. I use weighted buckets filled with sand or gravel, concrete-filled PVC sleeves, or specialty freestanding kits that are designed specifically for this purpose.
If you're building a freestanding arch, check out my full breakdown in Freestanding Giant Flower Arrangements for Events: Complete Guide — I go deep on base options and weight calculations there. It's one of my most thorough guides and will save you a lot of trial and error.
Once your arch shape is set, it's time for the flowers. I attach foam flowers using floral wire threaded through the flower base and wrapped around the pipe. Hot glue works too for lighter flowers, but wire gives you the option to reposition — which you will absolutely want to do.
Start from the outside edges and work toward the center. Fill in gaps with smaller blooms and greenery. Step back every few flowers to check balance. What looks even up close can look very lopsided from six feet away, so keep stepping back.
How to Build Garlands That Actually Drape Beautifully
Garlands are a different animal from arches. Instead of a rigid standing structure, you're creating something that drapes — and that means managing gravity the whole time.
Before you bend a single pipe, figure out where your garland will be anchored. Above a mantle? Draped between two columns? Hung from a ceiling beam? Your anchor points determine everything — the length of your garland, how much curve you need, and how many pipes you'll connect.
Rule of thumb: plan an anchor point every 12–18 inches along the garland. This prevents sagging between supports and keeps your shape consistent throughout the installation.
For a classic swag garland, you want a gentle downward curve in the middle. Lay your connected pipes on the floor and bend the center down by about 8–12 inches from the endpoints. That's your drape.
When you hang it, gravity will pull it a bit more, so account for that in your pre-bend. I usually bend slightly less than I think I need, hang it, and then adjust from there. It takes about five minutes to fine-tune once it's up.
Use S-hooks, command strips rated for the weight, or ribbon ties at each anchor point. Never rely on a single center hook for a long garland — the weight distribution will cause it to fold in half. Multiple attachment points are non-negotiable, especially for garlands over 6 feet long.
For garlands over 8 feet, I always do a full test hang at my studio before the event. I hang it, load it with flowers, and leave it for an hour to make sure nothing shifts or sags unexpectedly. Better to find out at home than at the venue.
🌸 Ready to build your first arch or garland?
Browse our full Bendable Pipes collection and grab everything you need to get started today.
The pipe is just the skeleton. What you put on it matters just as much. Here's what I've found works best for different types of builds.
EVA foam is lightweight, holds its shape beautifully, and doesn't get crushed during transport. It's what I use for the majority of my arch builds. If you're not familiar with working with it, my guide on every type of foam for giant flowers is a great place to start.
You can browse our EVA foam collection to find the right thickness for your petals — I generally use 2mm for delicate petals and 6mm for structural base layers. The weight difference between thicknesses really adds up across a full arch, so choose thoughtfully.
Paper flowers are gorgeous and budget-friendly. They're a bit more fragile, so I recommend them for indoor arches where they won't face wind or humidity. Check out the Large Fabric Flower Tutorial for techniques that translate beautifully to paper as well.
The most professional-looking arches mix at least three flower sizes: large focal flowers (12–18 inches), medium fillers (6–10 inches), and small accent blooms (3–5 inches). This creates depth and makes the whole thing look lush and intentional rather than flat and repetitive.
I also always add some greenery — eucalyptus leaves, fern fronds, or simple leaf clusters cut from craft foam — to break up the flowers and add that organic, garden-fresh feeling. It's a small detail that makes a huge visual difference.
💡 Pro Tip
Before permanently attaching anything, do a dry layout. Lay your flowers across the pipe on the floor in the arrangement you want. Take a photo. Then attach them one by one, referencing the photo as you go. This saves so much time compared to removing and repositioning after gluing.
One of the biggest financial wins of working with bendable pipes is that your investment doesn't end after one event. Here's how I handle storage and transport to keep my pipes in great shape for years.
If you're reusing the same arch shape for multiple events, store it bent. Hang it vertically from a hook in your studio or garage, or lay it flat on a shelf. Don't stack heavy items on top of a bent pipe — you can distort the curve unintentionally.
I label each stored structure with a tag that notes the event it was built for and the dimensions, so I can quickly identify which pipe is which when I'm prepping for the next job.
For transport, I partially straighten large arches so they fit in my van, then re-bend them on-site. The pipes handle this reshaping easily — I've done it dozens of times without any structural degradation. Bring your chalk or tape to re-trace your shape on the venue floor for a quick, accurate re-bend.
When you're ready for a completely new shape, simply bend the pipe in the opposite direction gradually until it straightens, then shape it fresh. I've reshaped some of my pipes six or seven times across completely different event styles — from a circular hoop for a baby shower to a wide asymmetric arch for a quinceañera — and they perform just as well every single time.
For a standard 8-foot-tall by 6-foot-wide semicircle wedding arch, you'll typically need 2–3 bendable pipes. If your arch is wider — say, 8 feet across — plan for 3–4 pipes to give you enough length and to reinforce the structure at connection points.
I always recommend buying one or two extra pipes beyond your estimate. They're not expensive, and having a spare on hand saves you from a last-minute supply run the night before an event.
Can bendable pipes be used outdoors?
Yes — bendable pipes themselves are perfectly fine outdoors. The bigger concern is your flowers. EVA foam flowers handle outdoor conditions well and can tolerate light humidity and mild wind. Paper flowers, on the other hand, are best kept indoors or in covered outdoor spaces.
For outdoor arches, I always stake or weight the base more heavily than I would indoors — wind creates lateral force that an indoor setup doesn't have to deal with. Double your ballast weight for any outdoor installation.
No special tools required at all — that's one of the things I love most about them. You bend bendable pipes entirely by hand, applying slow, steady pressure. No heat gun, no pipe bender, no power tools.
The only "tool" I'd recommend is a roll of chalk or painter's tape to trace your shape on the floor before you start bending. That simple step makes a huge difference in getting a symmetrical result quickly.
The key is anchor point frequency. Place a support hook or tie every 12–18 inches along the garland — not just at the ends. The more support points you have, the more consistent and intentional your drape will look.
Also, pre-bend your garland pipes with slightly less curve than you want the final result to be. Gravity and the weight of the flowers will add natural drape once it's hung, so starting with a shallower bend gives you room to adjust without over-drooping.
How long do bendable pipes last with regular use?
With proper care, a good set of bendable pipes can last years of regular event use. I have pipes in my studio that I've been reshaping and reusing for over three years across dozens of events. The key is avoiding sharp kinks — always bend gradually, never force a tight angle quickly.
Store them away from extreme heat (don't leave them in a hot car for extended periods) and they'll maintain their structural integrity beautifully. The investment really does pay for itself many times over.
What's the best way to attach foam flowers to a bendable pipe arch?
My preferred method is floral wire threaded through the base of the flower and wrapped tightly around the pipe. This gives you a secure hold while still allowing you to reposition the flower if needed — which you'll almost
Ready to Create Something Amazing?
Browse our collection of giant flower kits and start your next project today.