Giant Peony Tutorial: Lush Foam Petals for Romantic Events
If you've been searching for a giant peony foam flower tutorial that actually walks you through every single step — not just the pretty Instagram version — you're in the right place. Peonies are my absolute favorite flower to recreate in foam. There's something about that full, ruffled, outrageously lush shape that just translates perfectly into EVA foam. Better than any other flower, honestly.
I've made hundreds of these over the years. For weddings, quinceañeras, corporate installs, baby showers — you name it. And every single time I pull the finished bloom together, I still get a little thrill. That moment when the petals fan out and it suddenly looks like a two-foot peony? Chef's kiss.
So grab your heat gun, clear your table, and let's make something gorgeous. I'm going to walk you through materials, petal shaping, layering, and assembly — the whole thing. By the end of this, you'll have a foam peony that looks like it belongs at a Dolce & Gabbana runway show.
Real peonies are stunning. They're also expensive, seasonal, and gone within a week. According to a Brides.com survey, couples spend an average of $2,000–$2,500 on wedding flowers — and a significant chunk of that goes toward statement blooms like peonies.
Foam peonies? They last forever. Literally. I have a blush pink foam peony sitting on my studio shelf that I made three years ago and it still looks brand new.
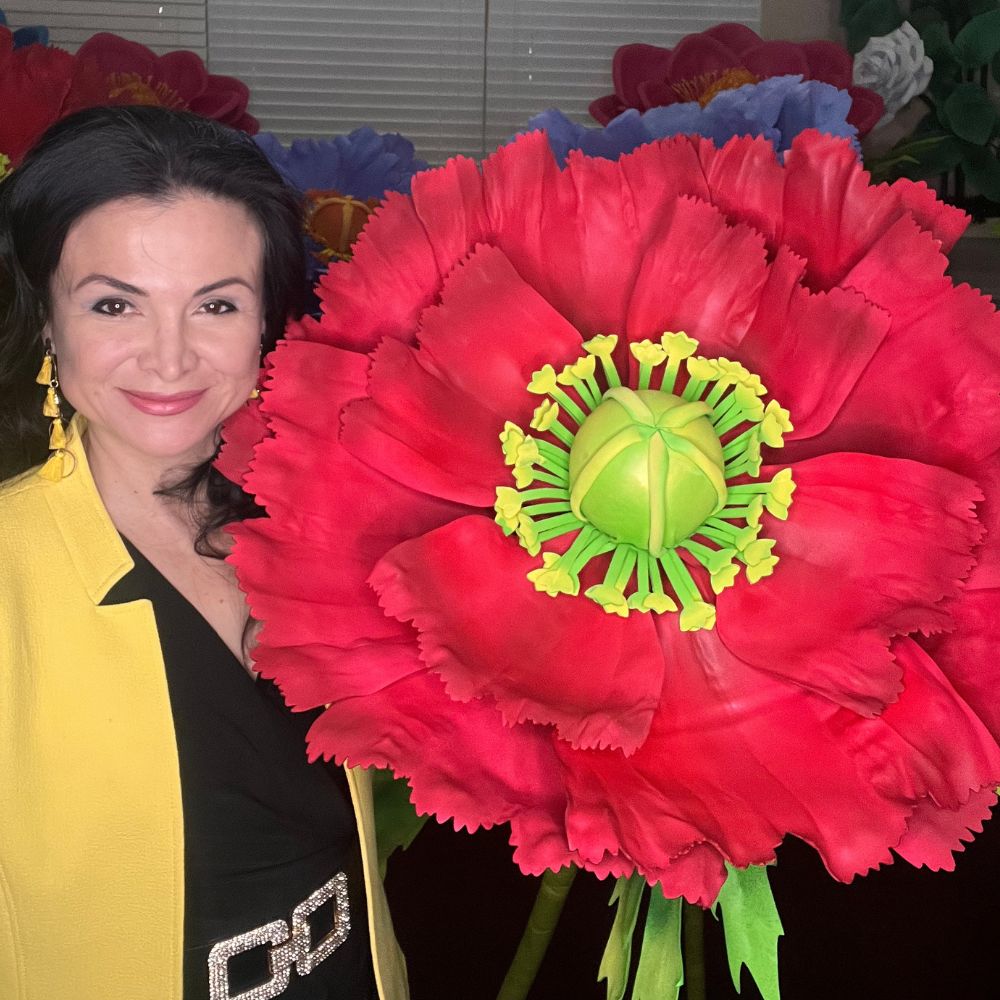
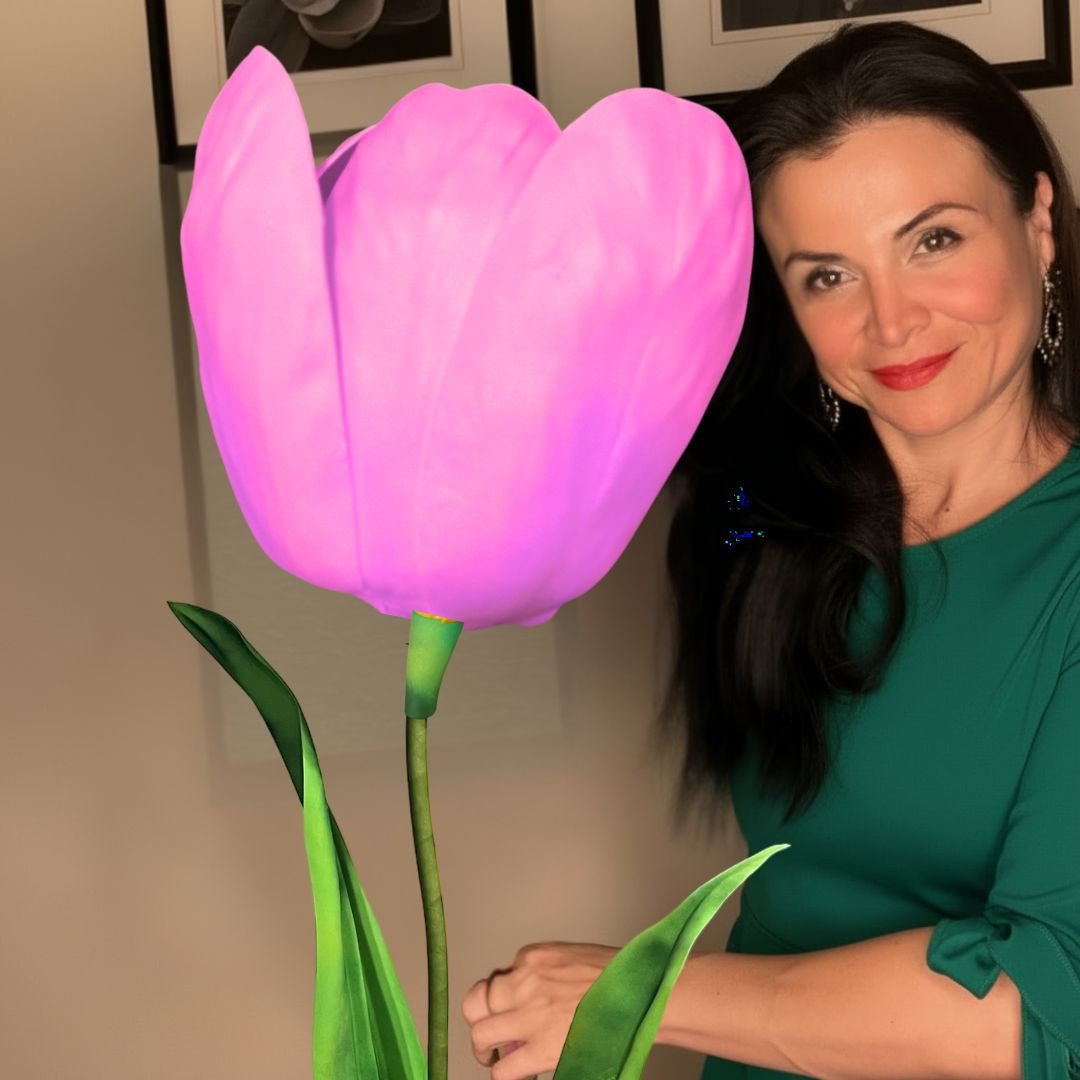
The other thing is scale. A real peony maxes out at maybe 5–6 inches across. A foam peony can be 24 to 36 inches wide. That's the kind of visual impact that stops people mid-scroll on Instagram and makes event guests actually gasp when they walk in the door.
According to Statista, the global events industry is projected to surpass $2.19 trillion by 2028. Couples, brands, and planners are all investing more in visual storytelling — and oversized floral installations are one of the biggest trends driving that.
If you're an event planner or a DIY bride, knowing how to make a stunning foam peony is genuinely a marketable skill. I've seen crafters turn this into full side businesses. (More on that in a sec.)
And if you just want to make something beautiful for your daughter's birthday party or your best friend's bridal shower? That's equally valid and equally amazing. Let's get into it.
Real talk — the materials make or break this project. I learned that the hard way when I first started and tried to cut corners with craft store foam. The petals cracked. They looked flat. It was a whole disaster.
Here's what you actually need:
- EVA Foam Sheets (2mm): This is your go-to for the inner, delicate petals. The thinner foam curls beautifully with heat and gives you that soft, ruffled peony texture.
- EVA Foam Sheets (6mm): Use this for the outer guard petals — the big, cupped ones at the base of the flower. They need more structure to hold their shape.
- Heat Gun: Non-negotiable. A $25–$40 heat gun from any hardware store works perfectly. Don't use a hair dryer — it doesn't get hot enough to shape EVA properly.
- Sharp Scissors or Craft Knife: Your cuts need to be clean. Dull scissors drag and tear the foam edges, which shows in the finished flower.
- Hot Glue Gun (high temp): Low-temp glue doesn't bond EVA foam well. Go high temp, go generous with the glue.
- Petal Templates: You'll need at least 3 different petal sizes — small, medium, and large. I'll give you the measurements below.
- Foam Ball or Cardboard Cone: This is your flower center. A 3–4 inch foam ball works beautifully for peonies.
- Acrylic Paint + Sponge Brush: Optional but highly recommended for adding depth, blush tones, or ombre effects.
If you want to skip the cutting and get pre-cut EVA foam kits with everything measured and ready to go, check out our shop at Amazing Giant Flowers. Every kit comes with video tutorials so you're never guessing.
But if you're cutting from scratch, here are your petal dimensions for a 24-inch finished peony:
One more thing before we start — color matters more than people think. Classic peony shades are blush pink, coral, deep magenta, soft white, and burgundy. For romantic events, I'm almost always reaching for blush or dusty rose foam. It photographs beautifully and pairs with everything.
If you want to go bold, a deep fuchsia or wine-colored peony against a greenery wall is absolutely breathtaking. Don't be afraid to go dramatic.
Ok, this is where it gets really fun. Shaping is the step most tutorials rush through, and it's honestly the most important part. A flat petal looks like craft foam. A shaped petal looks like a flower.
Here's how I approach it:
Step 1 — Shape Every Single Petal with Heat
Turn your heat gun on and hold it about 3–4 inches away from the foam surface. Move it in slow circles — don't hold it in one spot or you'll melt through the foam.
As the foam warms up (you'll see it start to soften in about 5–8 seconds), use your fingers or a rounded tool to curl and cup the petal. Work fast — EVA foam sets its shape within a few seconds of cooling.
For the small inner petals, I curl them tightly inward — almost like a little scroll. These mimic the tight center of a real peony bud.
For medium petals, I cup them gently — like a shallow bowl. Think of how a peony petal opens halfway.
For the large outer petals, I give them a soft backward curve at the tips. This creates that signature peony "open bloom" look where the outer petals almost lean back from the center.
I have a whole deep-dive on this technique over at my Heat Gun Techniques: Shaping Foam Flower Petals Like a Pro post if you want to get really precise with it. Seriously worth reading before you start.
Take your foam ball and start gluing your smallest, most tightly curled petals directly onto it. Pack them in close together — you want that dense, ruffled center that peonies are famous for.
Use about 8–10 tiny petals in the very center. Glue them at the base, let them fan upward. It should look a little messy and organic. That's correct. Peonies are not tidy flowers.
Once your center is built, start adding your medium petals in a circular layer around it. Offset each petal so it sits between two petals from the previous layer — just like real flower petals grow.
I usually do 2–3 rings of medium petals, each one slightly more open than the last. This is what gives the foam peony its incredible depth and dimension.
Then come your large outer guard petals. These go around the outside, curving back gently. At this point your flower is starting to look seriously impressive. I always take a little pause here just to appreciate it before finishing.
Glue the outer petals to a flat cardboard circle base (cut it to about 6–8 inches diameter) rather than directly to the foam ball. This gives the finished flower a clean, flat back for mounting or displaying.
According to HGTV's craft guides, the layering technique is consistently cited as the most critical factor in making paper and foam flowers look realistic. Rushing the layering is the number one reason DIY flowers look flat.
Take your time. Each layer matters.
This step is completely optional, but if you want your foam peony to look truly lush, a little paint goes a long way.
Mix acrylic paint with a tiny bit of water — just enough to make it flow easily. Using a wide sponge brush, lightly dust the petal edges with a slightly deeper shade than your base foam color.
For blush foam, I use a soft dusty rose or mauve at the tips. For white foam, a whisper of pale champagne or soft peach at the edges looks incredibly realistic.
You can also add a very light wash of green or yellow at the very center of the flower, right where the petals meet the foam ball. That's where the stamen would be on a real flower, and that tiny detail makes a huge difference.
For more on getting beautiful finishes on foam, my post on Flawless Foam Board Paint Finishes has everything you need.
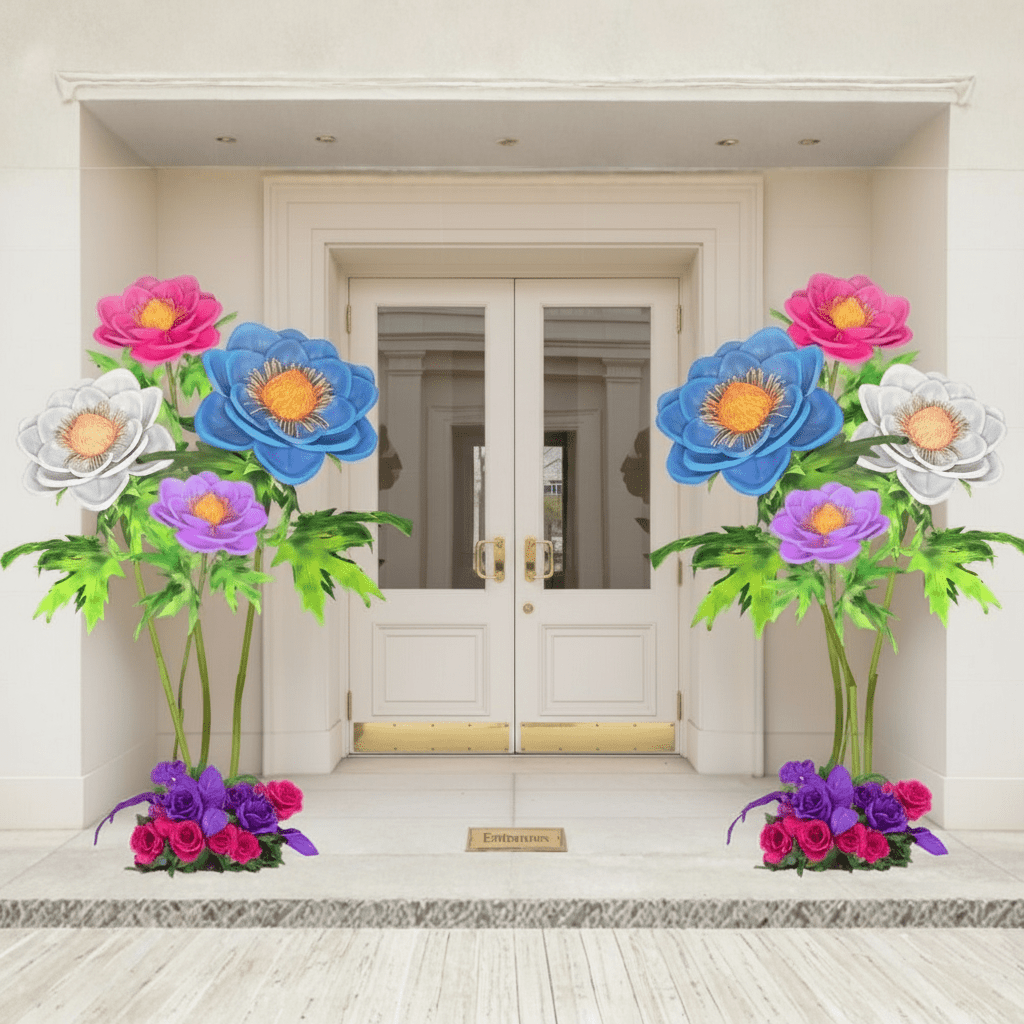
Displaying Your Giant Foam Peony at Events
You've built this gorgeous thing — now let's talk about how to actually use it. Because the display makes as much difference as the flower itself.
Here are the most popular ways I've seen these used at events:
According to WeddingWire, floral backdrops and oversized floral installations are consistently among the top 5 most-requested wedding décor elements year over year. Couples and planners are actively looking for cost-effective ways to achieve this look.
A set of 10 foam peonies costs a fraction of what a fresh floral installation would run. And they're reusable — which means event rental businesses can recoup their investment over and over again.
If you're making these for a quinceañera, I have a whole post on Quinceañera Backdrop Ideas with Giant Flowers that's full of color palette ideas and layout inspiration. Peonies in deep rose and gold? Absolutely stunning for that.
For baby showers, soft white and blush peonies on a backdrop wall are incredibly popular right now. My Baby Shower Backdrop Ideas post has some really beautiful examples.
One practical tip — if you're transporting these to an event, store each finished peony in a large plastic bag with a little tissue paper around the petals. They're surprisingly durable once fully assembled, but you don't want them getting crushed in transit.
I also recommend making a few spare petals when you cut your foam. If a petal gets damaged during transport or setup, you can swap it out in about two minutes with a hot glue gun. Event day emergencies are real — be prepared.
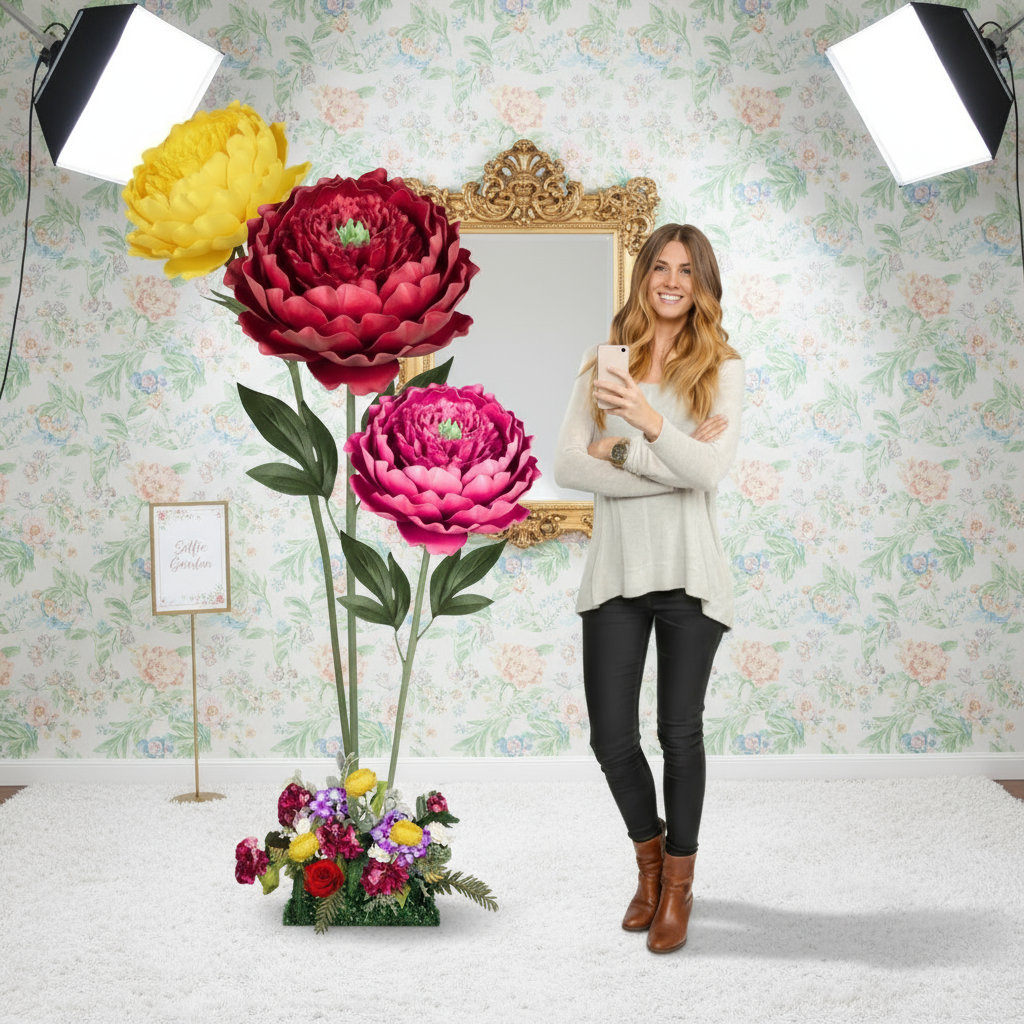
The Knot's annual wedding trend report noted that maximalist floral displays — think lush, full, overflowing arrangements — are dominating event aesthetics heading into 2026. Peonies, with their naturally full and ruffled shape, are perfectly positioned as the statement bloom of the moment.
Making them in foam means you can go as maximalist as you want without the budget spiraling out of control. That's the whole magic of this.
I've been doing this for years and I genuinely never get tired of watching someone see their finished foam peony for the first time. There's always this moment of — "Wait, I made that?" Yes. You did. And it's incredible.
If you're ready to dive in, our kits at Amazing Giant Flowers have everything pre-cut and ready — foam sheets, templates, stems, and full video tutorials so you're never stuck wondering what to do next. Have a question about your project? Drop it in the comments or reach out directly. I actually answer. What are you making these for? I'd love to know.
Ready to Create Something Amazing?
Browse our collection of giant flower kits and start your next project.
Shop All Flowers