Realistic Petal Veining Without an Airbrush
If you've ever held a real rose petal up to the light and watched those delicate veins catch the glow, you know exactly what I'm talking about. That's the moment every realism crafter chases — that split second where your handmade flower stops looking "crafty" and starts looking alive. And the good news? You don't need an airbrush to get there. The right petal veining technique — paired with the right mold — does most of the heavy lifting for you.
I'll be honest with you. When I first started making foam flowers, I thought veining was something only the cake decorating pros could pull off. All those sugar flower tutorials showed fancy equipment, professional airbrush setups, expensive pigments. I almost talked myself out of even trying. Then I pressed a petal into one of my double-sided molds for the first time and just... stared. The texture was already there. Already beautiful. I just needed to learn how to bring it to life with color.
This post is for the crafter who wants botanical realism — not a "pretty enough" flower, but one that makes people do a double-take. Whether you're working with EVA foam or sugar paste, I'm going to walk you through exactly how to get those lifelike veins without a single piece of expensive equipment.
Key Takeaways
Let me save you about six months of frustration right now. Trying to hand-draw veins onto a petal — even with a fine liner tool — almost never looks natural. Real veins branch in organic, asymmetrical patterns. Our hands want to make them too even, too deliberate.
That's exactly why I designed our flower molds to be double-sided. Both faces of the mold carry the vein detail, so when you press your petal, you get texture on both surfaces simultaneously. It mirrors what nature actually does — veins that run through the whole petal, not just painted on top.
What Makes a Vein Impression Look Real
There are three things that separate a realistic vein impression from a flat, unconvincing one:
This step gets skipped constantly, and it's the reason so many crafters are disappointed with their results. The material has to be in the right state before you press.
EVA foam needs to be warm and slightly pliable before mold pressing. I use a heat gun on low, moving it back and forth about 4–6 inches from the foam for 8–12 seconds. You want it soft but not floppy — if it droops when you hold it up, it's too hot. Let it cool for about 3 seconds, then press.
Our EVA foam sheets are specifically chosen for this — they hold mold impressions beautifully once cooled, and the vein detail stays crisp even after shaping. If you want to go deeper on heat shaping, I wrote a whole post on heat gun techniques for shaping foam flower petals that's worth bookmarking.
Roll your paste to about 1.5–2mm thickness — thinner than you think you need. Paste that's too thick won't pick up fine vein detail. Lightly grease your mold with white vegetable fat (Crisco works perfectly), press firmly and evenly with your thumb moving from the center vein outward, then peel back slowly from one corner.
Work quickly. Sugar paste starts drying the moment it's out of the bag, and a dry surface won't take a clean impression.
💡 Pro Tip
For sugar paste, chill your mold in the fridge for 10 minutes before use. The slight temperature difference between the cold mold and warm paste creates a cleaner release and sharper vein lines — especially on fine-detail flowers like sweet peas and ranunculus.
The No-Airbrush Petal Veining Technique: 4 Methods That Actually Work
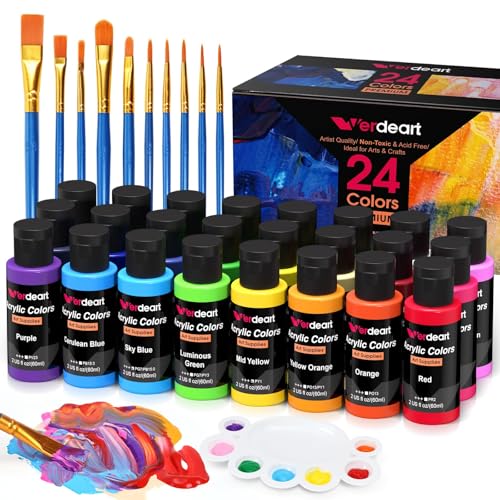
Ok, this is where it gets really fun. Once your vein impression is pressed in, the texture is your canvas. Here's how to make it pop — no airbrush, no compressor, no drama.
This is my personal go-to for foam petals and honestly, it's the technique I teach first in every workshop. Load a stiff-bristled brush (I use a size 6 flat shader) with a darker shade of your petal color — or a contrasting accent like burgundy on a pink petal. Then wipe almost all the paint off on a paper towel until the brush is nearly dry.
Drag it lightly across the petal surface. The raised vein ridges catch the pigment while the recessed areas stay lighter. The result looks exactly like natural petal shading. Build it up in 2–3 thin layers rather than one heavy pass.
Brush a thin layer of food-safe petal dust mixed with a tiny drop of clear alcohol (like vodka or Everclear) directly into the vein lines using a fine liner brush. The alcohol evaporates fast, leaving pigment deposited right in the grooves. It's precise, controllable, and dries without smearing.
For a softer look, skip the alcohol and use dry petal dust with a small flat brush, pressing into the veins and then wiping across the surface. The recessed lines hold the color; the smooth areas release it.
Soft chalk pastels — the kind you get at any art supply store — are wildly underrated for this. Scrape a little chalk dust onto a palette, pick it up with a soft round brush, and stipple it into the vein texture. On foam, seal it with a matte sealant spray afterward. On sugar paste, it's food-safe as long as you use non-toxic pastels (and many sugar artists do — always check your local regulations).
Mix a small amount of dark acrylic ink or watercolor with water — think the consistency of weak tea. Brush it liberally over the entire petal surface. The wash floods into the recessed vein lines and pools there, while you quickly wipe the raised surfaces with a damp cloth. What's left is a gorgeous, botanical-illustration quality vein pattern that looks like it was painted by someone with a lot more patience than me.
🌸 Ready to press your first realistic petal?
Browse our full flower mold collection — double-sided, food-safe compatible, and built for both foam crafters and cake decorators.
Choosing the Right Petal Veining Technique for Your Flower Type
Not every flower has the same vein structure. A peony petal has broad, gentle veins. A ranunculus has tight, dense ones. A tulip has bold parallel lines. Matching your coloring technique to the actual vein anatomy of your flower is what separates a good fake flower from a convincing one.
Here's something nobody tells you: veining that looks stunning up close can completely disappear from three feet away. For event work, backdrop installations, or DIY flower backdrops, you need veins that read at a distance.
The trick is contrast. Real petals have more color contrast than we expect. We tend to stay too safe — too close to the base color — and the veins get lost. Push your accent color two shades darker than feels comfortable. Once the petal is assembled into a full flower, that contrast softens naturally.
This three-layer approach is what makes the difference between a petal that looks "painted" and one that looks grown.
💡 Pro Tip
Reference a real flower or a high-quality botanical photo while you work. Don't trust your memory of what a rose looks like — actually look at one. The specific way veins branch, where they fade, what color they are relative to the petal — all of that is in the reference. Botanical illustrators have done this for centuries. We can too.
You've done all this beautiful work — don't let it smear or fade. Finishing matters.
A matte sealant spray is your best friend. Gloss sealers make foam look plasticky and actually flatten the appearance of veins by filling in the recessed lines with shine. Matte preserves the texture and gives the petal that soft, organic surface quality of a real bloom. Two light coats from about 12 inches away, letting each coat dry fully.
If you're painting on foam core or foam board as part of a larger installation, I've covered the best paint finishes in depth over in my post on flawless foam board paint finishes — worth a read if you're doing mixed-material work.
For Sugar and Gumpaste Petals
Once fully dry (usually 24–48 hours depending on humidity), a light brush of confectioners' glaze diluted 50/50 with alcohol gives a natural, slightly waxy finish that mimics real petal surfaces. For a completely matte finish, skip the glaze and simply steam the petal briefly — the steam sets the petal dust and gives a gorgeous soft sheen.
Realism isn't about perfection. It's about capturing the specific, glorious imperf
Ready to Create Something Amazing?
Browse our collection of giant flower kits and start your next project today.