Sealing and Priming EVA Foam: The Step Most Crafters Skip
Key Takeaways
- EVA foam is porous and flexible — skipping sealant causes paint to crack, peel, and absorb unevenly.
- The best sealers for EVA foam include Plasti-Dip, Mod Podge, Flexbond, and heat sealing with a heat gun.
- Priming after sealing gives paint something to grip — especially important for smooth, professional finishes on large pieces.
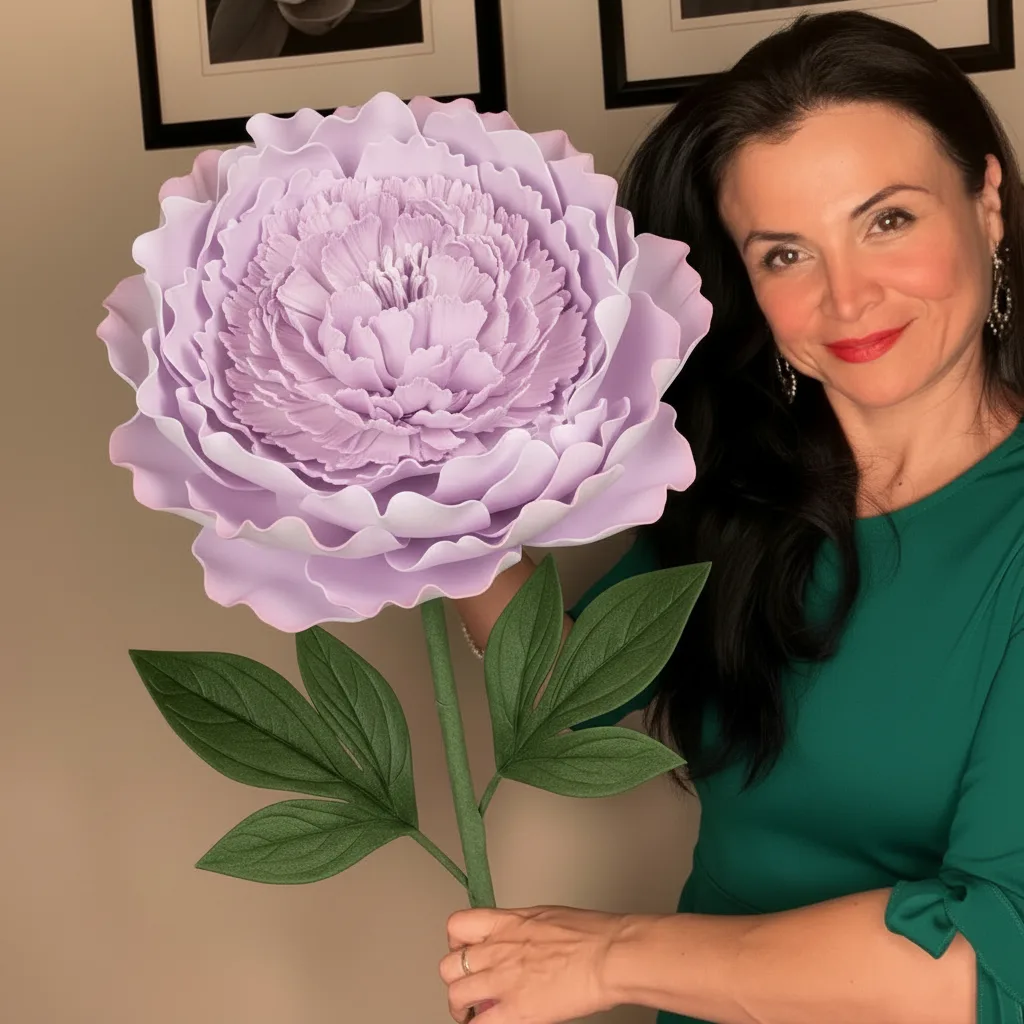
- For giant foam flowers (2–5 feet), sealing adds structural integrity and helps petals hold their shape longer.
- The full seal-prime-paint process takes about 2–4 hours of active work but can transform your results completely.
Why EVA Foam Needs Sealing Before Paint
What that means in practice: you apply paint and some areas go on beautifully, others look thin and streaky. You add another coat and it starts to look better — but then it dries and cracks along any bend or fold. That cracking is the real killer. Foam is flexible. Paint, especially acrylic paint straight on raw foam, is not. The paint film can't move with the foam, so it breaks.
The Porosity Problem
Think of raw EVA foam like a sponge with a very fine skin. When you brush paint directly onto it, the paint seeps into the micro-pores unevenly. You end up using way more paint than you should, and the finish still looks inconsistent. A good sealer closes those pores. It creates a unified surface that accepts paint evenly, dramatically reducing how much paint you need.The Flexibility Problem
This is especially important for giant flowers. My petals range from 12 to 36 inches long, and they flex constantly — during transport, installation, even just from air movement at events. If you've painted raw foam and seen fine spiderweb cracks appear after the first use, that's the flexibility problem. Sealing with a flexible medium bridges that gap between foam and paint.The 4 Best Methods for EVA Foam Sealing Priming Before Paint

Method 1: Heat Sealing with a Heat Gun
This is my personal favorite for giant foam flowers. No products needed — just a heat gun (or even a hair dryer on high, though a heat gun works better). When you apply gentle heat to EVA foam, the surface cells close up and the foam gets a slightly glossy, hardened skin. It takes about 30–60 seconds per petal if you keep the gun moving.The key is distance and movement. Hold the heat gun about 3–4 inches from the surface and keep it moving constantly. Stop in one spot and you'll melt or warp the foam — and trust me, I learned that the hard way on a batch of 40 petals once. Heat sealing is fast, free (if you have the tool), and works beautifully for large surface areas. It's my go-to first step before any other sealing method.
Method 2: Plasti-Dip
Plasti-Dip is a rubber coating that comes in spray cans or liquid form. It's incredibly flexible when dry, which makes it one of the best sealers for EVA foam that needs to bend and move. Two thin coats of Plasti-Dip create a rubbery skin over the foam that paint adheres to beautifully. It dries in about 30 minutes per coat at room temperature.The downside? It can add a slight texture if you spray too close. Keep the can at least 8–10 inches away and use light, sweeping passes. The clear version is best if you want to paint over it with light colors. Plasti-Dip runs about $8–12 per can at most hardware stores. One can covers roughly 15–20 square feet of foam surface.
Method 3: Mod Podge or Flexbond
These are the crafters' classics. Mod Podge (especially the matte or flexible versions) and Flexbond (a flexible floor adhesive that works brilliantly as a foam sealer) are both water-based, easy to apply with a brush, and dry clear. Flexbond in particular has become a cult favorite in the cosplay community for exactly this reason — it seals foam, remains flexible, and creates a fantastic paint-ready surface.Apply with a foam brush or soft bristle brush in thin, even coats. Two to three coats is the sweet spot. Let each coat dry fully — usually 20–30 minutes — before adding the next. The texture you get with Mod Podge is slightly smoother than Flexbond, making it better for delicate, detailed pieces. Flexbond is better for large, structural pieces that take a beating.
Method 4: Acrylic Gesso
Gesso is technically a primer, but it also acts as a light sealer on EVA foam. It's what painters use to prep canvas, and it works similarly here — it fills surface texture and creates a unified, slightly toothy surface for paint. Gesso works best after you've already done a base seal (heat or Plasti-Dip), used as the priming layer. On its own, it's not flexible enough for foam that bends a lot.Comparison: Which Sealing Method is Right for You?

| Method | Best For | Flexibility | Drying Time | Cost |
|---|---|---|---|---|
| Heat Gun | Large pieces, fast prep | Excellent | Instant | Free (tool only) |
| Plasti-Dip | Flexible, durable pieces | Excellent | 30 min/coat | $8–12/can |
| Mod Podge | Detailed, delicate pieces | Good | 20–30 min/coat | $6–10/bottle |
| Flexbond | Large structural pieces | Excellent | 20–30 min/coat | $15–20/quart |
| Gesso | Final prime coat before paint | Moderate | 30–45 min/coat | $8–15/bottle |
My Step-by-Step Process: EVA Foam Sealing, Priming, and Painting

Step 1: Cut and Shape First
Always cut and shape your foam before sealing. Sealing hardens the surface slightly, which can make cutting less clean. For my giant flower kits, all the pieces arrive pre-cut — but if you're working from raw sheets, get all your shapes done first. Shape your petals with the heat gun during this stage too (curling, cupping, veining).Step 2: Heat Seal the Surface
Run your heat gun over every surface you plan to paint. Keep it moving. You're looking for a very slight sheen to appear on the foam surface — that tells you the pores have closed. This takes about 1–2 minutes per large petal. Do both sides if you're painting both sides.Step 3: Apply Your Sealer of Choice
For giant flowers going to events, I use Plasti-Dip spray after heat sealing. Two thin coats, letting each dry completely. For smaller, more detailed pieces, I brush on two coats of Flexbond thinned slightly with water (about a 10:1 ratio, foam to water). This gives a smoother finish than straight Flexbond.Step 4: Light Sand (Optional but Recommended)
Once your sealer is fully dry, take a piece of 400-grit sandpaper and lightly scuff the surface. You're not sanding aggressively — just knocking down any brush marks or texture bumps. Wipe away the dust with a barely damp cloth. This step takes five minutes and makes a huge difference in your final paint finish.Step 5: Apply Primer
Now we prime. A light coat of white acrylic gesso or a flexible spray primer goes on here. This is especially important if you're painting light colors (white, pale pink, cream) over dark foam. Without primer, you'll need six coats of paint to get coverage. With primer? Two coats is usually plenty.Step 6: Paint
Finally — the fun part. Use acrylic craft paint or latex paint for foam. Both flex well when dry. Apply in thin layers. Build up color gradually. Two to three coats of properly thinned paint over a sealed and primed surface will give you a finish that looks genuinely professional.What Paint Works Best on Sealed EVA Foam?

- Acrylic Craft Paint (e.g., DecoArt, Folk Art): My everyday go-to. Affordable, huge color range, dries flexible enough for foam. Mix with a tiny drop of fabric medium for extra flexibility.
- Latex Wall Paint: Surprisingly great for large foam pieces. The same flexibility that makes it work on walls makes it perfect for foam. Plus you can get it tinted to any color at the hardware store.
- Spray Paint (Acrylic-based): Fast and even for large areas. Make sure it says "acrylic" — enamel spray paint can eat into foam even through a sealer.
- Chalk Paint: Beautiful matte finish, great for vintage or soft looks. Needs a flexible topcoat sealant afterward or it will dust off.
- Alcohol Inks: Stunning for transparent, jewel-toned effects on sealed foam. Advanced technique but gorgeous results.
According to Statista, the US DIY craft market is valued at over $44 billion — and foam crafting is one of the fastest-growing segments within it. More people are making giant foam flowers than ever before, which means more people are discovering (sometimes painfully) why prep work matters.
Common Mistakes to Avoid

- Skipping heat sealing before liquid sealers: Heat sealing first closes the pores so your liquid sealer sits on top of the foam instead of soaking in. Without it, you'll use twice as much Flexbond or Mod Podge.
- Applying sealer too thick: Thick coats crack. Always thin and build up in layers. This is the single most common mistake I see in my workshop students.
- Using enamel spray paint: Even through a sealer, aggressive solvents can cause foam to bubble or warp. Always check the label — acrylic only.
- Painting over damp sealer: I know, I know — you're excited and you want to keep going. But painting over sealer that hasn't fully cured leads to lifting and bubbling. Give it the full dry time.
- Skipping primer for light colors: Raw foam (even sealed) is often gray or dark. Without primer, light colors will look muddy and uneven no matter how many coats you add.
How Sealing Affects Giant Flower Durability
Without sealing? Paint starts chipping within weeks, especially if the flowers are handled frequently. The foam itself starts to look dingy because dust and dirt embed into the porous surface. If you're making flowers for a wedding arch or a photo backdrop, you want them to look perfect on the day and survive being packed up and stored afterward. Sealing is what makes that possible.
A The Knot survey found that couples spend an average of $29,000 on their wedding. Giant foam flowers are one of the best investments in that budget because they're reusable — but only if they're made to last.
Sealing for Outdoor vs. Indoor Use
For Outdoor Foam Flowers
After painting, seal the entire finished piece with a UV-resistant clear coat spray. Products like Krylon UV-Resistant Clear or Rust-Oleum Crystal Clear protect against sun fading and moisture. EVA foam itself is water-resistant, but paint and sealers can absorb moisture over time. A UV topcoat adds that final layer of protection.For events where flowers might be exposed to direct sun for hours, I also recommend avoiding very dark colors — they absorb heat and can cause the foam to warp slightly in intense heat. Lighter colors reflect heat and hold their shape better. If you're planning giant foam flowers for a wedding arch outdoors, this topcoat step is non-negotiable.
Sealing Tips Specifically for Giant Flowers
Work in sections. A 36-inch petal is awkward to seal all at once. I work from the tip down to the base, letting each section dry slightly before moving to the next. Use a spray sealer for speed. Brushing Flexbond onto 50 petals takes forever. For large batches, Plasti-Dip spray is a game-changer. I can seal a full bundle kit worth of petals in under an hour.
Hang pieces to dry when possible. Laying petals flat while they dry can cause them to stick to your work surface if any sealer drips over the edge. I clip them to a drying rack or clothesline with binder clips. Do a test piece first. Whenever I'm using a new sealer or paint combination, I always test it on a scrap piece of the same foam first. Five minutes of testing saves hours of regret.
If you want to learn more about working with different foam types, I've got a deep dive in A Crafter's Guide to Every Type of Foam for Giant Flowers that covers densities, thicknesses, and which foams take paint best. And if you're curious about painting on foam core board specifically, A Crafter's Guide To Painting On Foam Core walks through a slightly different process that's worth reading alongside this one.
Frequently Asked Questions
Do you have to seal EVA foam before painting?
Technically no — but you really, really should. Painting raw EVA foam leads to uneven absorption, poor coverage, and paint that cracks when the foam flexes. Sealing first closes the pores, creates a unified surface, and makes your paint job last dramatically longer. For anything beyond a quick prototype, sealing is worth every minute.
What is the best sealer for EVA foam?
It depends on your project. For large pieces that need to flex (like giant flower petals), Plasti-Dip or Flexbond are my top picks because they stay flexible when dry. For smaller, detailed pieces, Mod Podge Matte works beautifully. Heat sealing with a heat gun is the best free option and works well as a first step before any liquid sealer.
Can I use regular spray paint on EVA foam?
You can use acrylic-based spray paint on sealed EVA foam — it works great. What you want to avoid is enamel spray paint, which contains solvents that can melt or bubble foam even through a sealer. Always check the label. If it says "acrylic" you're good. If it says "enamel" or doesn't specify, skip it.
How many coats of sealer does EVA foam need?
For most projects, two coats of sealer is the sweet spot. One coat seals the surface adequately, but two coats ensures full, even coverage and gives you a much smoother base for paint. If you're using Mod Podge or Flexbond, three thin coats beat two thick ones every time — thick coats crack as they dry.
Does sealing EVA foam make it stiffer?
Slightly, yes — but not enough to be a problem for most projects. Heat sealing adds minimal stiffness. Liquid sealers like Flexbond and Plasti-Dip add a tiny bit more. For giant flower petals, this slight stiffening is actually a benefit — it helps the petals hold their shape. If you need your foam to remain very flexible (like for a wearable costume piece), stick to heat sealing only.
How long should I wait between sealer coats?
For most liquid sealers, wait until the coat is fully dry to the touch — usually 20–30 minutes at room temperature. Rushing this is one of the most common mistakes. If you apply a second coat over a still-tacky first coat, you'll get lifting, bubbling, and an uneven surface. When in doubt, give it an extra 10 minutes. Patience here pays off in the final finish.
Here's what I want you to take away from all of this: the prep work is the work. The beautiful painted finish that makes people stop and stare at your giant flowers? That starts with a sealed, primed surface — not with the paint itself. I've seen so many talented crafters get frustrated because their paint jobs don't look right, and nine times out of ten it's because they skipped this step. Don't skip it. You've got the knowledge now — go make something gorgeous. If you're ready to start your giant flower project, check out our full shop — all our kits come with pre-cut foam so you can jump straight to the fun part. And if you have questions about sealing, priming, or anything else foam-related, drop them in the comments. I read every single one.
Ready to Create Something Amazing?
Browse our collection of giant flower kits and start your next project today.