Prom Photo Backdrop Ideas: DIY Giant Flowers Your School Will Love

Prom season is one of those magical moments that deserves a backdrop as stunning as the night itself. If you've been searching for prom photo backdrop ideas DIY that actually look professional — not like a last-minute craft project — you are in the right place. I've helped schools, event planners, and parent committees create jaw-dropping floral installations that have people stopping mid-hallway just to stare.
Here's what I know after years of doing this: the photo backdrop is the one thing every single student will interact with on prom night. It's in hundreds of photos. It shows up on Instagram stories. It's the first thing parents ask about when they see the pictures. Getting it right matters more than almost anything else in that venue.
In this guide I'm walking you through everything — from picking your color palette to building giant EVA foam flowers that will genuinely blow people away. Whether you're a parent volunteer, a student council sponsor, or a professional event planner tackling your first school gig, I've got you covered.
Key Takeaways
Let me be real with you. I've seen every kind of backdrop at school events — balloon walls, fabric drapes, cardboard cutouts, those sad little paper flower clusters that wilt by 8pm. None of them photograph the way giant flowers do.
Giant flowers create depth, dimension, and drama. When you put a student in front of a wall of 3-foot blooms, the camera absolutely loves it. The petals catch light differently depending on the angle. The colors pop. The scale makes the humans in the photo look like they stepped into a fairytale.
According to Statista, American families spend an average of $1,000 or more on prom per student when you factor in tickets, attire, transportation, and accessories. The backdrop is the one element the whole group shares — it deserves that same level of intention.
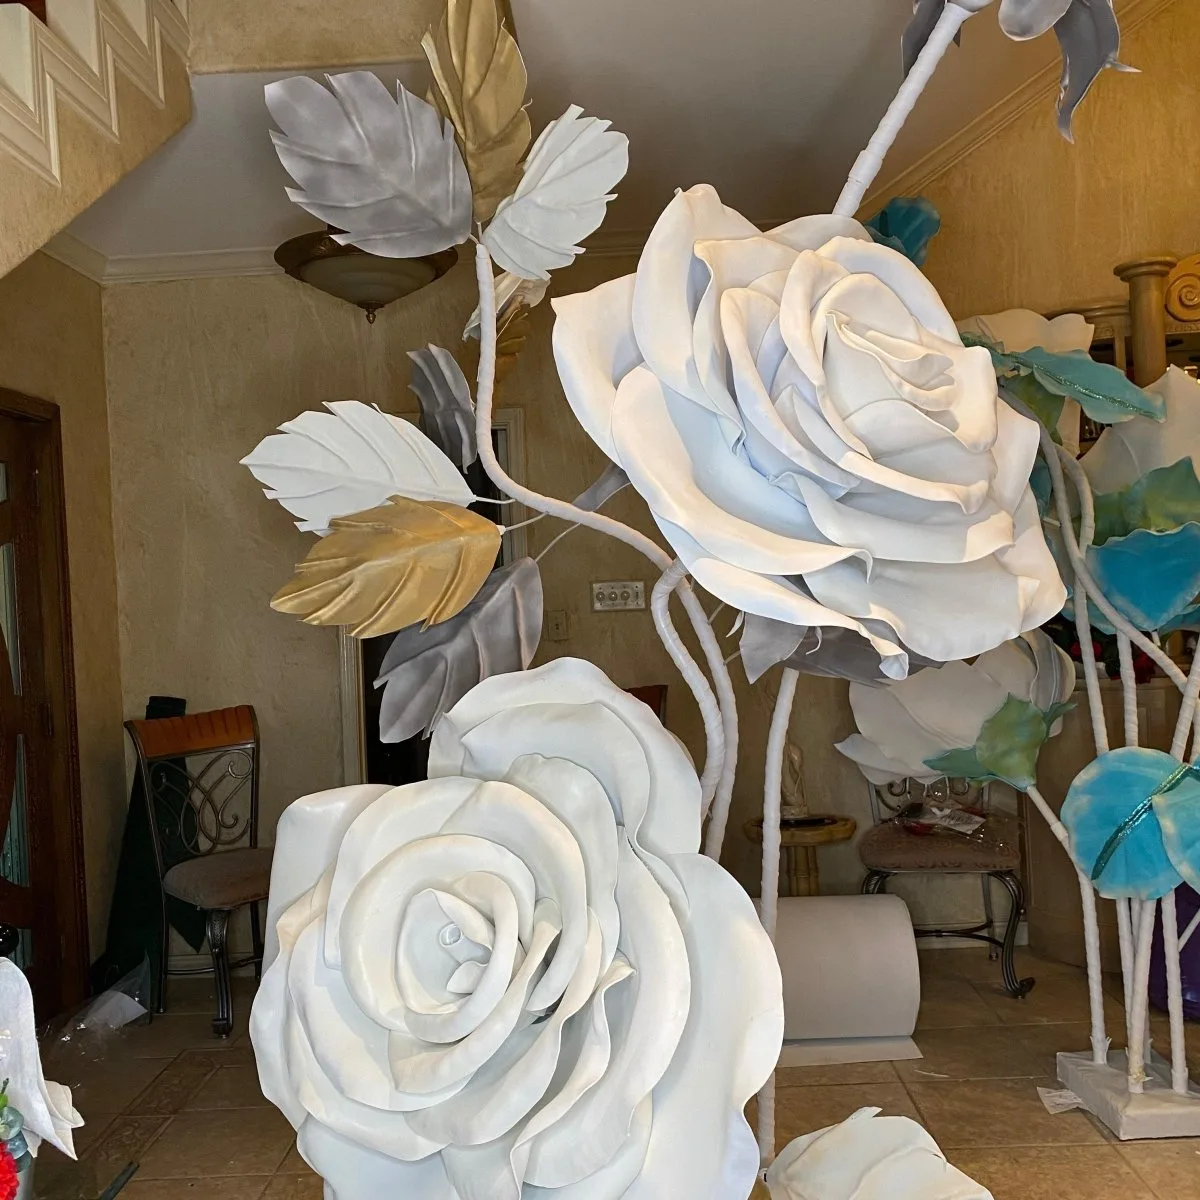
And here's the thing about EVA foam specifically. It's lightweight, waterproof, and incredibly durable. Unlike paper flowers that get crushed in transport or crepe that tears if someone brushes against it, EVA foam holds its shape all night long. I've had clients use the same set of flowers for three consecutive proms.
Before you order a single flower, measure your backdrop wall. This sounds obvious but you'd be surprised how many people skip this step and end up with a backdrop that looks sparse on a 12-foot wall.
A standard prom photo backdrop wall is typically 8 feet tall by 10–12 feet wide. For that size, you're looking at 10–15 giant flowers in a mix of sizes to fill it beautifully without looking cluttered.
You've got two main options: freestanding flowers on stems or wall-mounted flowers. Both work beautifully for prom, but they suit different venue setups.
The color palette decision is where most prom committees get stuck. My advice? Pick three colors max. Two main colors and one accent. More than that and the backdrop starts looking chaotic in photos rather than intentional.
Some of my favorite prom color combinations right now: blush + white + gold, dusty blue + sage + cream, deep burgundy + blush + ivory, and the always-stunning all-white with greenery accents. That last one photographs beautifully in literally any lighting.
Prom Photo Backdrop Ideas DIY: 6 Stunning Styles to Consider
1. The Garden Wall
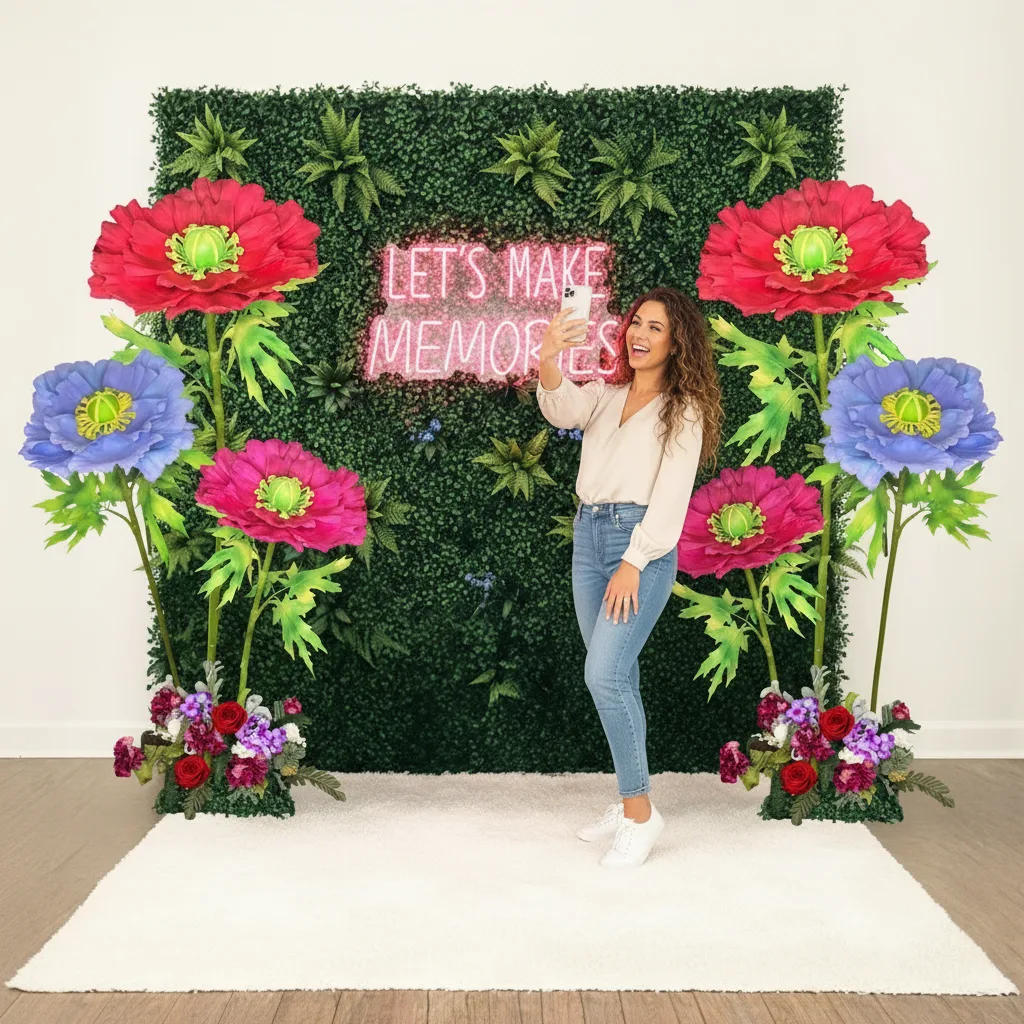
This is the most popular style I see for prom, and honestly it's my personal favorite. You mix 3–5 different flower varieties at varying heights — some on tall stems reaching 5 feet, some mid-height at 3 feet, and a few nestled low near the floor.
The layered effect looks like you walked into a secret garden. Add some trailing greenery or eucalyptus between the foam flowers and the whole thing comes alive. Students go absolutely wild for this style because it gives them so many different ways to pose.
Choose one flower color and go from deep to light across the backdrop — dark purple on one end fading through lavender to palest blush on the other. It's graphic, modern, and photographs like a dream.
This style works especially well for schools with specific school colors. You can honor the colors while still making something that looks high-fashion rather than school-spirit-banner.
All one color. All the drama. An all-white giant flower backdrop has a timeless, editorial quality that makes every single outfit pop in front of it. All blush is equally stunning. All deep red reads as incredibly luxurious.
This is also the easiest color story to execute because you don't have to worry about color balance. If you're new to building backdrops, start here. You can read more about creating this look in my guide on White Flowers on Wall: A Pro's How-To Guide.
4. The Arch Frame Backdrop
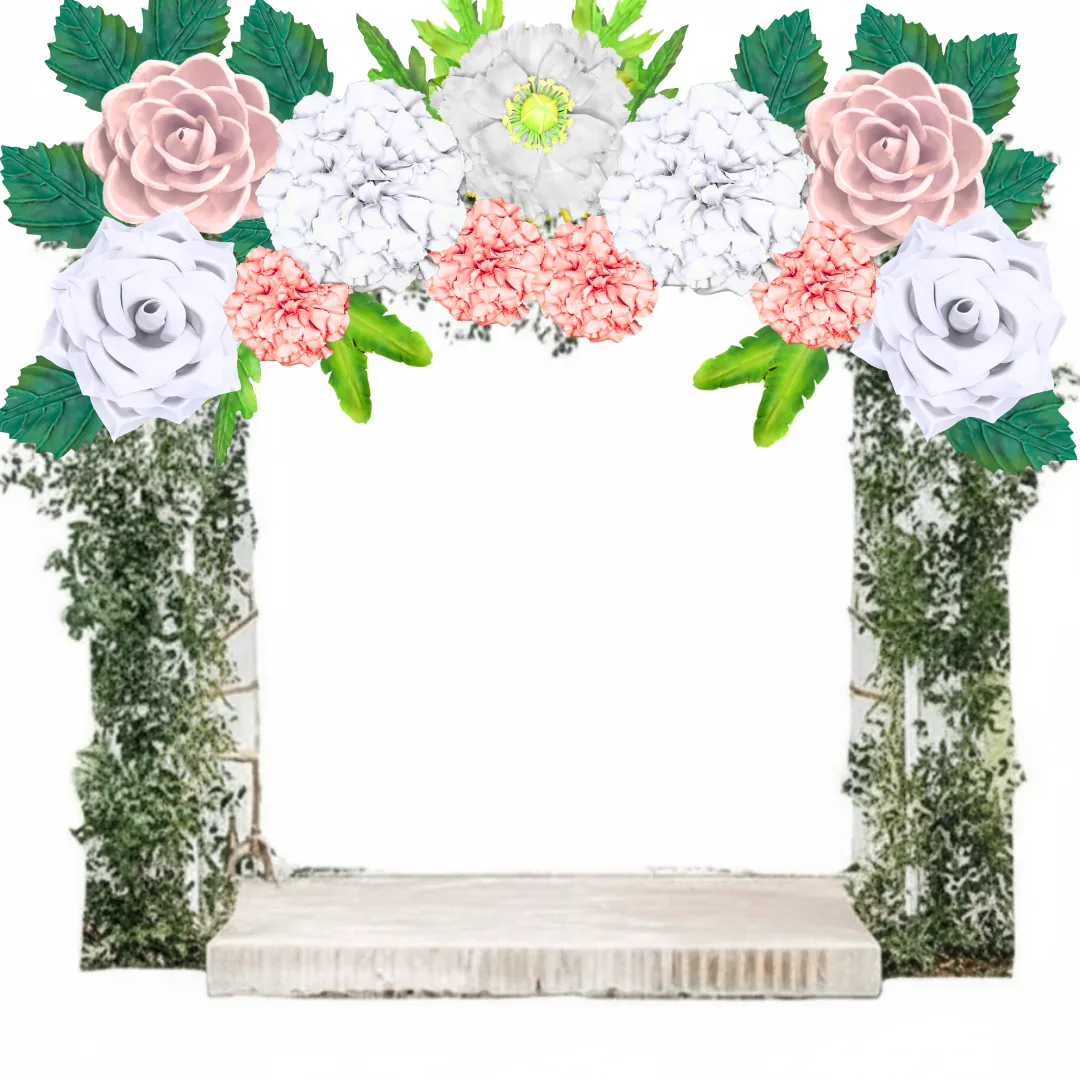
Instead of covering an entire wall, you build a floral arch that frames the photo area. Students stand inside or in front of the arch, and the flowers create a natural frame around them in every shot.
This uses fewer flowers — sometimes as few as 6–8 giant blooms — which can stretch a tighter budget further. Our How to Make an Oversized Flower Arch Backdrop guide walks through this in detail.
Cover the bottom half of your backdrop wall with giant flowers and let greenery or fabric drape fill the upper half. This creates a layered, textured look that photographs beautifully and uses your flower budget strategically.
It also tends to look more organic and less "event rental" than a perfectly symmetrical full wall. Real talk — sometimes the slightly imperfect, garden-grown look is exactly what makes a backdrop feel special.
No wall at all. Just a cluster of freestanding giant flowers on stems, arranged at varying heights, with students stepping into the arrangement for photos. It's immersive, three-dimensional, and gives photographers so much to work with.
This is my top recommendation for venues where you absolutely cannot touch the walls. The flowers become the set, not just the background.
Materials That Actually Work: An Honest Breakdown

I've made giant flowers out of just about everything over the years. Crepe paper, tissue paper, fabric, cardstock, and EVA foam. Here's my completely honest take on what works for a prom backdrop specifically.
Honestly? EVA foam wins every single time for an event like prom. The investment is higher upfront but when you consider that your school can reuse these flowers for homecoming, graduation, and next year's prom — the cost-per-use becomes incredibly reasonable.
Start with our pre-cut EVA foam flower kits. Everything arrives pre-cut — you're not sitting there with scissors and a template trying to cut uniform petals for hours. That alone saves 4–6 hours of prep time.
Beyond the kit, you'll need: a hot glue gun (industrial strength, not craft-store mini), extra glue sticks, a foam-safe paint if you're customizing colors, and your bendable pipe stems if you're going freestanding.
Each giant flower is built from the outside in — large outer petals first, then medium, then the inner petals, then the center. The video tutorials included with every kit walk you through this clearly.
Work on a flat surface and let each layer set for a minute before adding the next. Don't rush the glue. When I first started making giant flowers, I ruined so many petals by pulling them before the glue had set — learn from my mistakes.
EVA foam takes paint beautifully. If you want to add ombre effects, glitter edges, or metallic tips to your petals, do this before assembly. Use foam-safe acrylic paint and a wide, soft brush for the smoothest finish.
I have a full tutorial on this in my guide on Flawless Foam Board Paint Finishes — it covers everything from prep to sealing so your color lasts all night.
Step 4: Attach to Your Structure
For wall-mounted flowers, use Command strips for lighter flowers or zip ties through a pipe-and-drape system for heavier arrangements. For freestanding flowers, thread your bendable pipe stem through the back of the flower and anchor it in a weighted base — a bucket filled with floral foam or sand works perfectly.
Arrange your flowers before the event day so you can adjust heights and spacing without the pressure of a ticking clock. Always do a dry run layout.
Step back and look at your backdrop from 10–15 feet away — that's approximately the distance from which most photos will be taken. Adjust any flowers that look too close together or create awkward gaps.
Add greenery, fairy lights, or a simple fabric drape behind the flowers if your wall needs more depth. Sometimes the simplest additions make the biggest difference in how the finished backdrop photographs.
Let's talk numbers, because I know budget is a real conversation for school events. According to The Knot, professional floral installations for events can run $500–$5,000 or more depending on scale. A DIY giant flower backdrop gets you that same visual impact for a fraction of the cost.
A Brides.com analysis found that foam and paper flower alternatives save event hosts 40–70% compared to fresh floral installations of equivalent visual impact. For a school working with a fixed committee budget, that difference is enormous.
I've seen enough prom backdrops — good and bad — to know exactly where things go wrong. Let me save you the headache.
Here's something most prom committees don't think about: your giant flower backdrop doesn't have to live only at the photo station. Giant flowers can do double duty all over your venue.
Flank the entrance with two or three tall freestanding flowers to create a dramatic arrival moment. Use smaller clusters as table centerpieces. Line the pathway to the dance floor. According to Event Marketer, immersive environments — where the decor extends throughout the space rather than being confined to one spot — create significantly stronger emotional memories for attendees.
You can also check out my guide on Giant Flower Centerpieces: Stunning Ideas for 2026 Events for ideas on extending your floral theme beyond the backdrop wall.
And if your school is planning multiple events — homecoming, graduation, a spring dance — the same flower kit works for all of them. Just rearrange, repaint if needed, and you have a completely fresh look every time. That's the investment argument that wins over every budget committee I've ever talked to.
You've built this gorgeous backdrop. Now make sure the photos actually do it justice. A few quick tips I always share with event coordinators.
Distance matters. Position your photo line so students stand at least 2–3 feet in front of the backdrop, not pressed against it. This creates separation and lets the flowers be visible as a background rather than a wall behind their heads.
Lighting angle. If you have any control over lighting, position a light source slightly to the side of the backdrop rather than straight on. Side lighting creates shadows in the petals that show off the three-dimensional texture of the flowers — that's what makes them look so spectacular in photos.
According to WeddingWire, photo backdrops that include dimensional elements (flowers, greenery, textured fabric) generate 3x more social media shares than flat printed backdrops. For prom, where students are sharing photos all night long, that social engagement is part of the magic.
For a standard 8-foot by 10-foot backdrop wall, plan on 10–15 giant flowers in a mix of sizes. If you're doing an arch style, you can achieve a beautiful look with as few as 6–8 flowers. The key is mixing sizes — 2-foot, 3-foot, and 4-foot blooms — rather than using all one size, which tends to look flat in photos.
With our pre-cut kits, most people assemble each flower in 45 minutes to 1.5 hours depending on the complexity of the bloom. For a full 12-flower backdrop, budget about 2–3 full days of crafting if you're working alone, or one long day with a team of 3–4 people. Always build in at least one extra day for adjustments and setup at the venue.
Absolutely — and this is one of the biggest advantages of EVA foam over paper or fabric flowers. With proper storage (laying flat or hanging, away from direct sunlight), giant foam flowers last 3–5 years easily. Many schools reuse the same set for homecoming, graduation, and subsequent proms, making the initial investment extremely cost-effective over time.
The most photogenic backdrops use 2–3 colors maximum. All-white, blush and white, and dusty blue with cream are perennially popular because they complement virtually every skin tone and outfit color. Avoid very dark backgrounds if your venue has low lighting — dark flowers can disappear in photos. If you want to honor school colors, use them as an accent rather than the dominant color.
The most important tool is a high-temperature industrial hot glue gun — not the small craft-store variety. Beyond that, you need the pre-cut foam pieces (included in our kits), extra glue sticks, and optionally foam-safe acrylic paint if you want to customize colors. Our kits also include video tutorials that walk through every step, so even true beginners can build beautiful flowers.
Yes! Our freestanding kits with bendable pipe stems are specifically designed for venues where you can't mount anything to the walls. The stems are weighted at the base and can be adjusted to different heights — from about 3 feet to 6 feet tall. Freestanding arrangements actually create a more immersive, three-dimensional photo experience because students can step into the arrangement rather than just standing in front of it.
Prom night is one of those memories that lasts forever — and the backdrop is literally the backdrop to all of it. You have the vision, and now you have the roadmap. Whether you go full garden wall or a simple elegant arch, giant flowers are going to make your prom photo station the most talked-about spot of the night.
If you're ready to get started, browse our full selection of giant flower kits at Amazing Giant Flowers. I'm always happy to help you figure out exactly what you need for your space and your budget — just reach out. What style are you leaning toward for your prom backdrop?
Ready to Create Something Amazing?
Browse our collection of giant flower kits and start your next project today.