Giant Hibiscus Craft: Tropical Foam Flowers for Beach Events
Key Takeaways
- EVA foam is the best material for giant hibiscus flowers — it's lightweight, durable, and holds its shape beautifully outdoors.
- A finished giant hibiscus typically measures 24–36 inches across and uses 5–7 petals plus a signature stamen center.
- You can build a complete tropical flower display for a beach event starting at around $80–$150 in materials.
- Heat shaping is the secret to getting those gorgeous curved, realistic hibiscus petals — don't skip that step.
- Giant foam hibiscus flowers can be mounted on walls, placed freestanding, or used in arches and backdrops for maximum visual impact.
Why Giant Hibiscus Flowers Are Perfect for Tropical Events
The hibiscus is basically the unofficial flower of tropical celebrations. It's bold, it's colorful, and it has that unmistakable silhouette that instantly says "beach party" or "island wedding."
Real hibiscus flowers are stunning, but they wilt fast — especially in outdoor heat. A giant foam hibiscus gives you all that visual impact without the wilting, the cost, or the last-minute florist stress.
According to a Brides.com survey, couples spend an average of $2,000–$2,500 on wedding flowers. For a tropical beach wedding, that number climbs even higher when you factor in exotic blooms and humidity-resistant arrangements.
DIY foam hibiscus flowers let you redirect that budget. You can create a full tropical backdrop — think 12 to 15 giant blooms — for a fraction of what a florist would charge.
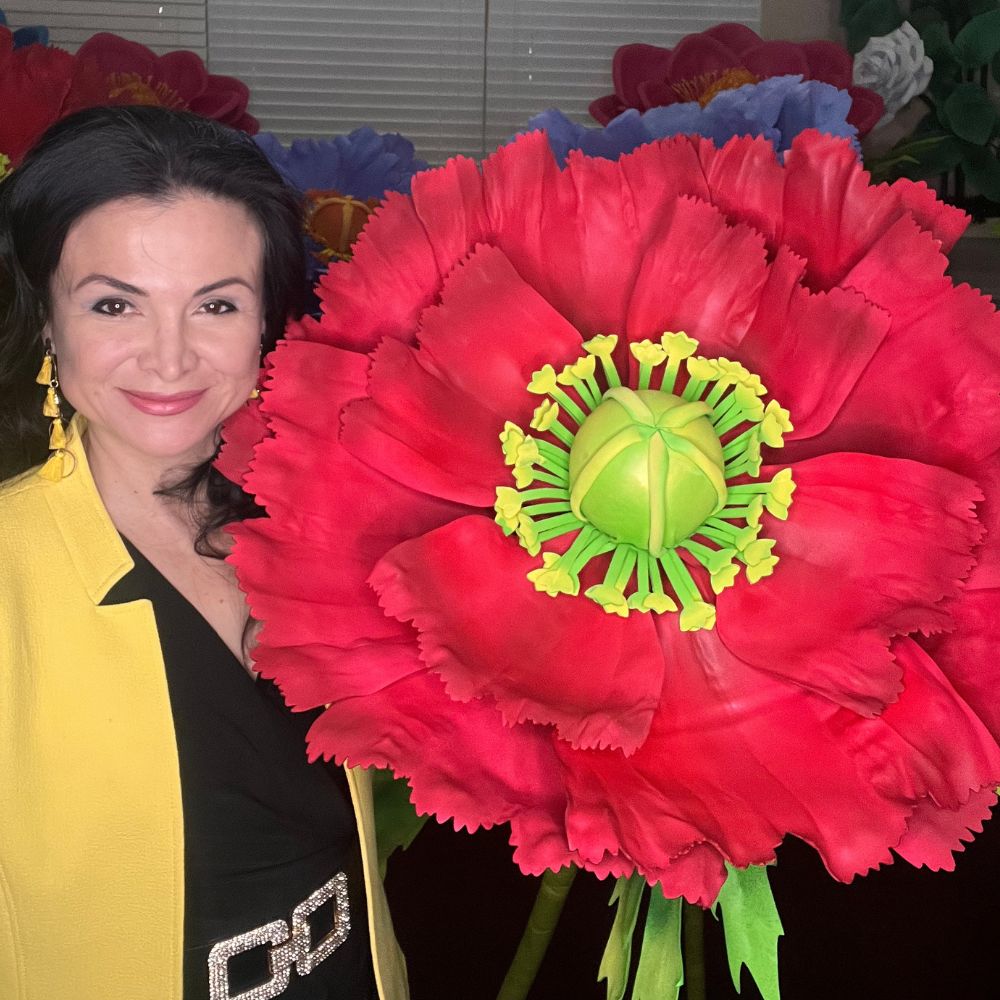
And the scale is everything. A 3-foot foam hibiscus does what no real flower can — it becomes a statement piece, a photo backdrop, a design anchor for your entire event space.
I've seen these flowers used at Disney-level productions and intimate backyard luaus. The reaction is always the same: people stop, stare, and immediately grab their phones.
Materials You'll Need for Your Giant Hibiscus Tropical Flower Craft

📺 Watch our step-by-step tutorial: How to Make a Giant Hibiscus
Let me walk you through exactly what you need before you cut a single petal. Getting your materials right makes everything else so much easier.
The Core Material: EVA Foam
EVA foam (ethylene-vinyl acetate) is the material I use for every single giant flower I make. It's flexible, lightweight, heat-shapeable, and holds paint beautifully.
For hibiscus petals, I recommend 2mm EVA foam sheets for the main petals. It's thin enough to curl and shape but sturdy enough to hold its form — even outdoors in coastal humidity.
For the center base and stamen, go with 6mm EVA foam. You need that extra thickness to anchor everything together and give your flower structure.
Full Materials List
- EVA Foam Sheets (2mm): For the main petals — you'll need about 4–5 sheets in your chosen hibiscus color (hot pink, coral, red, or yellow are classic).
- EVA Foam Sheets (6mm): For the base disc and stamen support — 1–2 sheets is plenty.
- Heat Gun or Embossing Heat Tool: This is non-negotiable. You need heat to shape and curl the petals realistically.
- Sharp Craft Knife or Die Cutter: Clean cuts make all the difference. A dull blade will drag and tear your foam.
- Hot Glue Gun (high temp): Low-temp glue doesn't bond EVA foam well. Go high-temp and work fast.
- Acrylic Paint + Foam Brush: For adding color depth, gradient effects, and veining details to your petals.
- Bendable Pipe Stems: If you want a freestanding flower, you'll need sturdy wire stems — I sell these in my shop and they make a huge difference.
- Floral Tape: For wrapping stems and securing the stamen.
- Petal Template (printed or hand-drawn): Hibiscus petals have a very specific shape — wide at the base, pointed at the tip, with slightly ruffled edges.
Real talk? Don't skip the heat gun. I see so many people try to make giant foam flowers without one and the petals just lie flat. The heat is what gives them that gorgeous, lifelike curl and dimension.
How to Create Your Hibiscus Petal Template
This step is where your giant hibiscus tropical flower craft really starts to take shape — literally. The petal template determines everything about how your finished flower looks.
A hibiscus petal is not a simple oval. It has a distinctive shape: wide at the base (about 8–10 inches across), tapering to a pointed tip, with slightly wavy or ruffled outer edges.
Drawing Your Template
Start with a large piece of cardstock or poster board. Draw a teardrop shape about 18 inches tall and 10 inches wide at its widest point for a 30-inch finished flower.
Now add the ruffled edge detail. Along the outer edges of the petal (not the base), draw gentle undulating curves — like small waves. This is what makes it look like a hibiscus instead of a generic flower.
The base of the petal should have a slight V-notch cut into the center — about 1 inch deep. This is where the petals overlap when you assemble the flower.
Sizing Guide for Different Event Scales
| Finished Flower Size | Petal Length | Petal Width | Best Use |
|---|---|---|---|
| 18–20 inches | 12 inches | 7 inches | Table centerpieces, small backdrops |
| 24–28 inches | 15 inches | 9 inches | Photo backdrops, arch accents |
| 30–36 inches | 18–20 inches | 10–12 inches | Statement pieces, ceremony backdrops |
| 48–60 inches | 24–28 inches | 14–16 inches | Grand entrances, commercial displays |
For most beach events, I recommend the 30-inch size. It's visible from a distance, photographs beautifully, and isn't so massive that it becomes hard to transport or install.
Step-by-Step: Cutting and Shaping Your Hibiscus Petals
Ok, this is where it gets really fun. Grab your foam, your template, and your heat gun — let's make some petals.
Step 1: Trace and Cut
Lay your petal template on the 2mm EVA foam sheet and trace around it with a ballpoint pen or chalk marker. You'll need 5 petals for the first layer and 5 petals for the second layer (slightly smaller — about 80% of the original size).
Cut along your traced lines with a sharp craft knife. Use smooth, confident strokes — don't saw back and forth. Clean cuts are everything for a professional finish.
When I first started making giant flowers, I ruined so many petals with a dull blade. Now I swap out my blade after every 10–12 cuts. Fresh blades = clean edges = beautiful flowers.
Step 2: Paint Before You Shape
Here's a tip most tutorials skip: paint your petals before you heat-shape them. It's so much easier to paint a flat surface than a curved one.
For a classic hibiscus, start with your base color — hot pink, coral red, or bright yellow work beautifully. Apply two coats with a foam brush, letting each coat dry fully.
Then add the signature hibiscus detail: a deeper color at the base of each petal, fading toward the tip. Real hibiscus flowers have this gorgeous gradient — dark magenta or burgundy at the center, lightening to pink or coral at the edges. Use a dry-brush technique to blend.
For more on getting perfect paint finishes on foam, check out my guide: Your Guide to Flawless Foam Board Paint Finishes.
Step 3: Heat Shape the Petals
This is the magic step. Set your heat gun to medium heat and hold it about 3–4 inches from the foam surface. Move it in slow, sweeping motions — don't hold it in one spot or you'll melt a hole.
As the foam warms, it becomes pliable and soft. Use your hands (carefully — the foam will be warm) to curl the edges upward and inward. Cup the petal in your palm to create a natural bowl shape.
For the ruffled edges, use your fingertips to pinch and wave the outer edge while the foam is still warm. Hold the shape for about 30 seconds until it cools and sets. That's it — it holds permanently.
Shape all 10 petals this way. Your outer layer petals should have a deeper cup; your inner layer petals should be slightly more upright and tightly curved.
Building the Stamen: The Signature Hibiscus Detail
You can't have a hibiscus without that dramatic protruding stamen. It's the long, column-like center with little stamens at the tip — it's what makes a hibiscus instantly recognizable.
Creating the Stamen Column
Cut a strip of 6mm EVA foam about 10 inches long and 2 inches wide. Roll it tightly into a cylinder and secure with hot glue. This is your stamen column.
Paint the column bright yellow or white — hibiscus stamens are typically a contrasting color to the petals. Once dry, use a heat gun to very slightly soften the top and flare it open just a tiny bit.
Adding the Stamen Tips
Cut about 15–20 small teardrop shapes from yellow or white 2mm foam — each about 1 inch long. These are the individual stamens.
Glue them around the top of the column, pointing outward and slightly upward. The finished stamen should look like a little firework of tiny blooms at the top of the column.
This detail is what separates a great giant hibiscus from a generic flower. Don't rush it.
Assembling Your Giant Hibiscus Flower
Assembly is where your giant hibiscus tropical flower craft comes to life. Take your time here — the arrangement of your petals determines the final look.
Building the Base
Cut a circular base disc from 6mm EVA foam — about 8 inches in diameter for a 30-inch flower. This is the foundation everything attaches to.
If you're making a freestanding flower, push your bendable pipe stem through the center of this disc now and secure it with hot glue. Make sure it's centered and straight.
Attaching the Outer Petals
Lay your 5 large outer petals around the base disc, evenly spaced like a clock — at 12, 2:30, 5, 7:30, and 10 o'clock positions. The V-notch at each petal base should point toward the center.
Apply a generous bead of hot glue to the base of each petal and press firmly onto the disc. Hold for 15–20 seconds per petal until the glue sets.
Adding the Inner Petals
Now place your 5 smaller inner petals in the gaps between the outer petals. They should sit slightly higher and more upright than the outer layer, creating depth and dimension.
Glue these down the same way. Step back and look at your flower from the front — adjust any petals that look off-center before the glue fully cures.
Attaching the Stamen
Finally, glue your finished stamen column directly in the center of the flower. It should protrude forward by about 4–6 inches for that classic hibiscus drama.
Surround the base of the stamen with a few small teardrop-shaped foam leaves or a small ring of tightly-rolled foam to cover the raw edges where petals meet. This finishing touch makes a huge difference.
Color Palettes and Styling Ideas for Tropical Beach Events
One of the most fun parts of this whole giant hibiscus tropical flower craft journey is choosing your colors. Hibiscus comes in such a gorgeous range — let me give you some of my favorite combinations.
Classic Tropical Palettes
- Hot Pink + Yellow Stamen: The most iconic hibiscus combo. Instantly tropical, works with everything from white linens to rattan furniture.
- Coral + Gold Stamen: A more sophisticated take on tropical — perfect for beach weddings with a romantic, sunset vibe.
- Red + White Stamen: Bold and dramatic. Stunning against neutral backdrops or greenery walls.
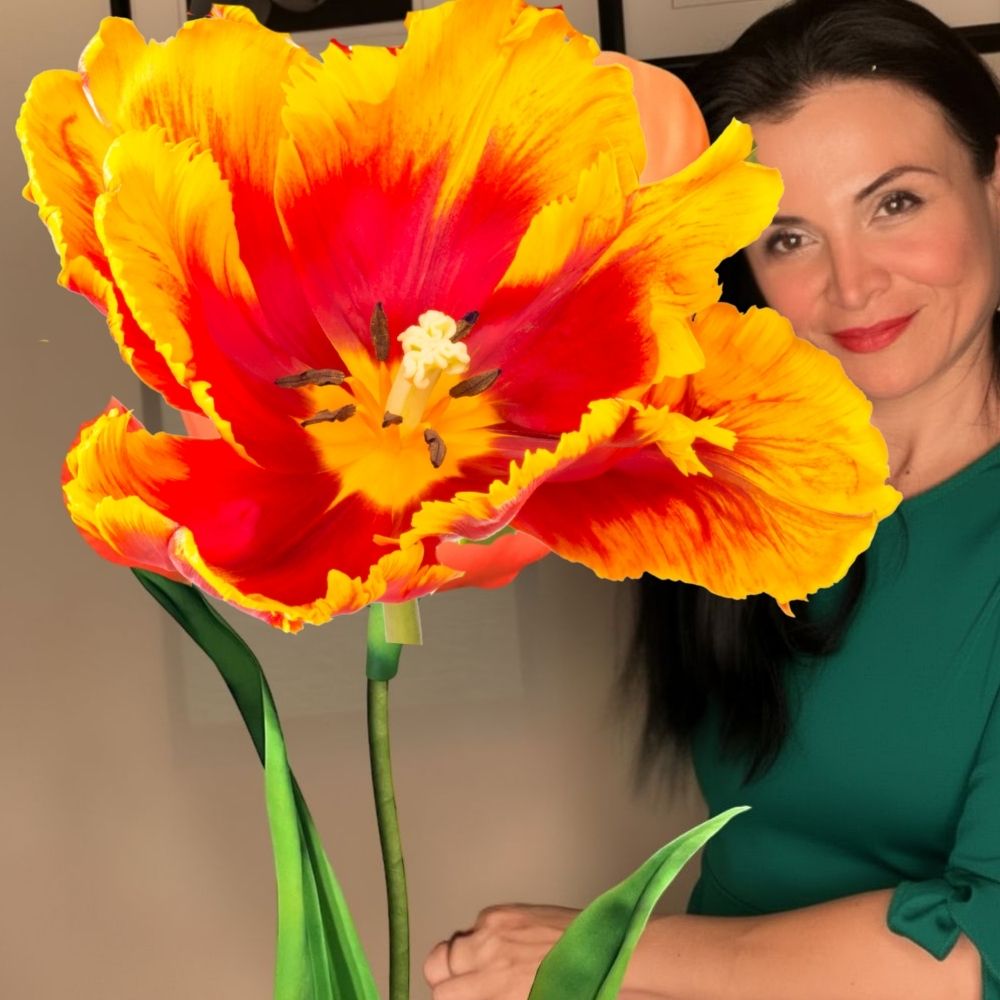
- Yellow + Orange Gradient: Think Hawaiian sunshine. Incredible for daytime outdoor events with natural light.
- White + Pale Pink Center: Elegant and beachy. Perfect for tropical-themed bridal showers or white-on-white wedding aesthetics.
Styling Your Giant Hibiscus for Maximum Impact
Giant hibiscus flowers work beautifully in so many configurations. Here are my favorite ways to use them at beach events:
Ceremony Arches: Cluster 8–12 giant hibiscus flowers with palm leaves and tropical greenery on a bamboo or metal arch. The result is absolutely breathtaking. Check out my guide on Giant Flower Wedding Arch: A Complete Guide for 2026 for more inspiration.
Photo Backdrops: A wall of mixed-size hibiscus flowers in coral, pink, and yellow is one of the most-photographed setups I've ever created. Guests will not stop taking pictures. See how I approach these in my DIY Giant Flower Backdrop for Photos tutorial.
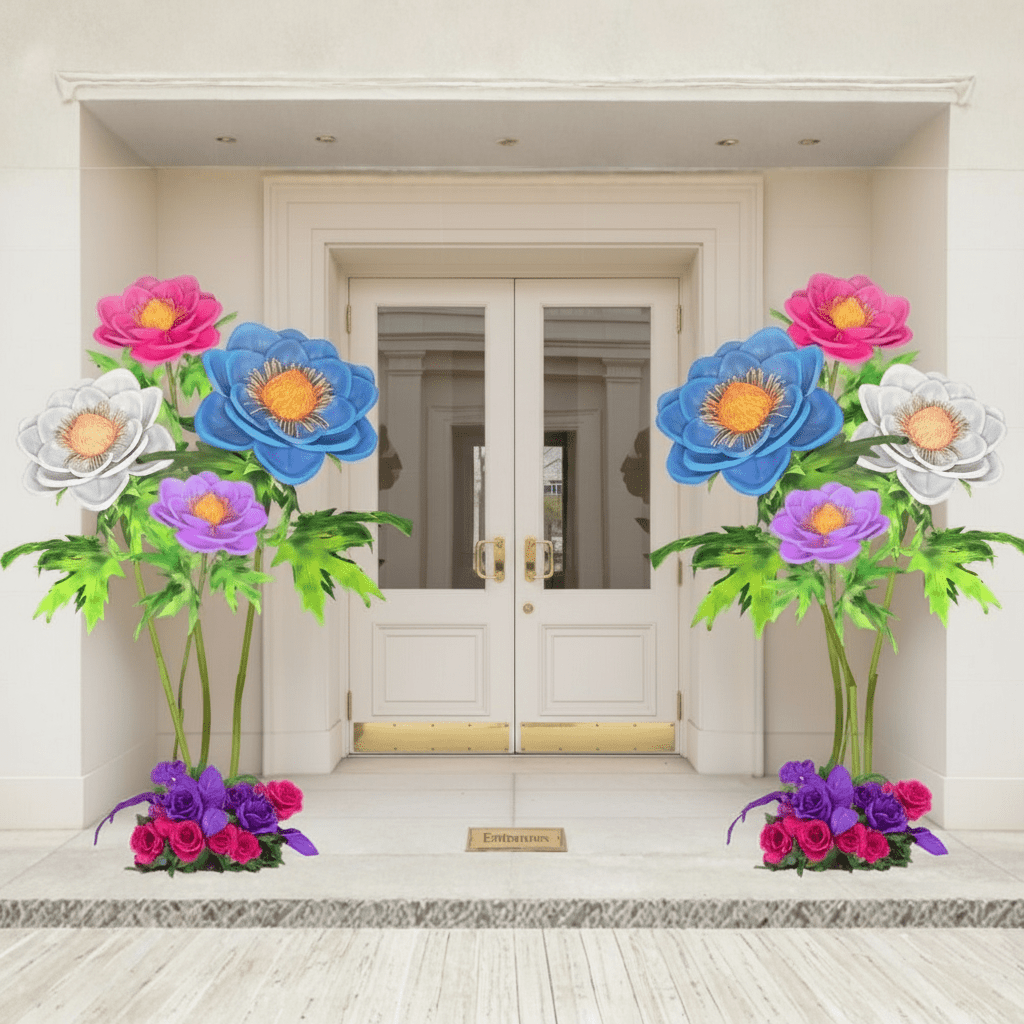
Freestanding Statement Pieces: Place 2–3 giant freestanding hibiscus flowers at venue entrances or flanking a sweetheart table. They frame the space without blocking sight lines.
Table Centerpieces: Smaller 18–20 inch hibiscus flowers on tall stems make stunning tropical centerpieces. For more centerpiece ideas, browse my Giant Flower Centerpieces guide.
Giant Foam Hibiscus vs. Fresh Flowers: The Real Comparison
I get asked this all the time: "But won't real flowers look better?" Honestly? Not always — especially for outdoor beach events. Let me break it down.
| Factor | Giant Foam Hibiscus | Fresh Hibiscus Flowers |
|---|---|---|
| Cost | $15–$40 per flower (DIY) | $8–$15 per stem, wilts in hours |
| Durability | Lasts years with proper storage | 4–8 hours in outdoor heat |
| Size Impact | Up to 5 feet — massive visual impact | 4–6 inches max per bloom |
| Weather Resistance | Handles humidity and heat well | Wilts rapidly in beach conditions |
| Reusability | Fully reusable — event after event | Single use only |
| Setup Flexibility | Can be installed days in advance | Must be installed same day |
| Photo Impact | Dramatic scale, vibrant color | Beautiful but small in frame |
According to IBISWorld, the US floral industry is worth $7.9 billion — but a growing slice of that market is shifting toward artificial and foam alternatives, especially for events where longevity and scale matter.
For a beach event in July heat? Foam wins. Every time.
Tips for Outdoor Beach Event Installation
Installing giant flowers at a beach or outdoor venue comes with its own set of challenges. Wind, sand, and humidity are real factors. Here's how I handle them.
Anchoring Freestanding Flowers
For beach events, standard floor stands won't cut it in sandy or uneven terrain. I use heavy-duty PVC pipe sections filled with concrete or sand, inserted into the ground, with the flower stem sliding inside.
Alternatively, weighted buckets disguised with tropical fabric or greenery work beautifully. Place them behind the flower so they're hidden from the front view.
Wind-Proofing Your Display
Coastal wind is no joke. For wall-mounted flowers, use heavy-duty Command strips plus zip ties to secure to any frame or structure. For freestanding arrangements, add fishing line guy wires from the stem to a fixed point — they're invisible in photos but make a huge difference in stability.
Protecting Your Flowers from Humidity
EVA foam is naturally moisture-resistant, which is one of the reasons I love it for outdoor events. But if you're painting your flowers, seal the paint with a clear acrylic spray sealer — two coats — before the event. This protects the color from salt air and humidity.
A The Knot survey found that over 60% of couples choose outdoor venues for their weddings. That's a lot of events that need weather-resistant decor solutions.
How to Use Pre-Cut Kits to Speed Up Your Build
I know not everyone has hours to spend cutting foam by hand — and that's exactly why I created pre-cut kits at Amazing Giant Flowers.
Our kits come with every petal pre-cut to exact dimensions, plus video tutorials that walk you through every step of the assembly and shaping process. You skip the template-making and cutting entirely and jump straight to the fun part.
Our Freestanding Giant Flower Kits start at around $80–$180 and include the foam, stems, and full instructions. Our Bundle Kits (8–12 flowers) run $350–$600 and are perfect if you're decorating a full event or building a backdrop.
According to Statista, the US DIY craft market is projected to grow significantly through 2026 — and event-focused crafts are one of the fastest-growing segments. More people than ever are choosing to DIY their event decor, and I love that.
If you want to see more about building large-scale flower displays, my guide on Large Floral Arrangement Ideas for Stunning Displays is a great next read.
Frequently Asked Questions
What is the best foam for making a giant hibiscus tropical flower craft?
EVA foam is hands-down the best material. It's lightweight, heat-shapeable, moisture-resistant, and durable — perfect for both indoor and outdoor events. For hibiscus petals, use 2mm thickness for flexibility and natural-looking curves. For
Ready to Create Something Amazing?
Browse our collection of giant flower kits and start your next project.
Shop All Flowers