How to Make Foam Roses at Home Without a Big Budget
Key Takeaways
- You can make a stunning giant foam rose at home for under $20 in materials — no professional tools required.
- EVA foam (2mm–6mm thickness) is the best material for realistic, durable petals that hold their shape beautifully.
- A heat gun or hair dryer is the secret weapon for curling and shaping petals into that gorgeous, natural rose curve.
- Foam roses can be made freestanding (with a pipe stem) or wall-mounted, and they work for weddings, baby showers, birthdays, and more.
- Pre-cut kits from Amazing Giant Flowers can save you hours of prep time if you want to skip straight to the fun part.
Why Foam Roses Are the Ultimate DIY Event Flower
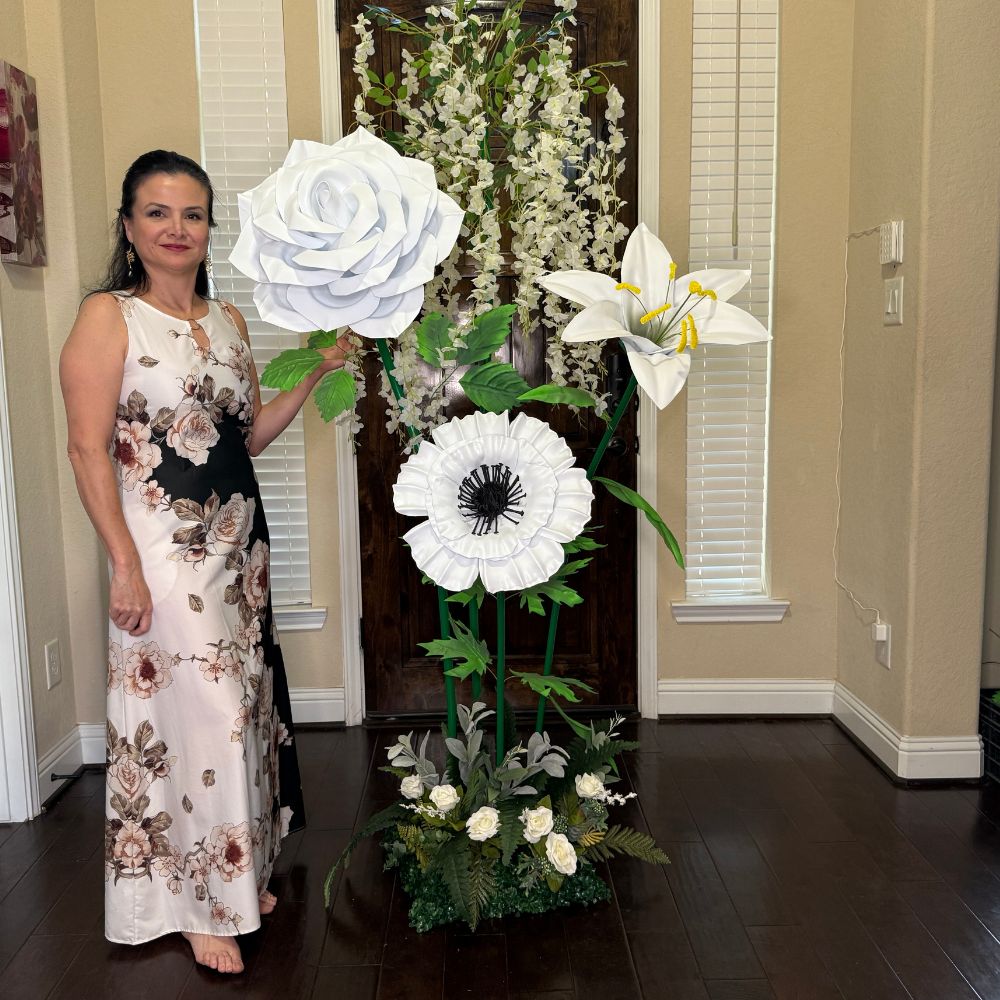
Beyond durability, foam roses are endlessly customizable. You can make them 12 inches across or 4 feet tall. You can paint them any color under the sun — blush pink, deep burgundy, ombre gold. You can add glitter, metallic finishes, or keep them clean and matte. And honestly? They photograph beautifully. That's why brands like Disney and Dolce & Gabbana use giant foam flowers in their displays. The scale and the color pop in photos in a way that fresh flowers simply can't match.
Materials You Need to Make Foam Roses at Home
📺 Watch our step-by-step tutorial: How to Make a Giant Rose
Let me keep this simple. You don't need a lot. Here's exactly what I use:- EVA Foam Sheets (2mm–4mm): This is your main material. For petals, I love 2mm foam for the outer petals and 4mm foam for the inner core petals. It's flexible, lightweight, and takes paint beautifully. You can find it at craft stores or grab it from our shop.
- Heat Gun or Hair Dryer: This is your secret weapon. Heat is what lets you curl and shape the foam into natural-looking petals. A heat gun gives you more control, but a hair dryer on high works just fine for beginners.
- Hot Glue Gun + Glue Sticks: You'll go through more glue than you think. Buy the big pack. I'm serious.
- Sharp Scissors or Craft Knife: Clean cuts make a huge difference in how professional your petals look. Dull scissors = ragged edges = sad petals.
- Petal Templates: Print or trace your petal shapes onto cardstock. I'll walk you through the shapes you need below.
- Acrylic Paint + Foam Brush: For coloring your rose. Acrylics work great on EVA foam and dry quickly.
- Bendable Pipe Stem (optional): If you want a freestanding flower, you'll need a sturdy stem. We sell bendable pipe stems that are perfect for this.
Total material cost for one medium foam rose (about 18–24 inches across)? Somewhere between **$8 and $20**, depending on what you already have at home. That's the kind of budget I can get behind.
Understanding Petal Shapes: The Foundation of a Realistic Foam Rose
The Inner Cone (The Heart of the Rose)
The very center of a rose is a tight spiral. To replicate this, you'll cut a teardrop or elongated oval shape, about 4–6 inches long, from your 4mm foam. Roll it tightly and glue the base. This becomes the bud at the center of everything.Mid-Layer Petals
These petals are slightly wider and rounder — think a classic petal shape, about 6–10 inches long for a medium rose. You'll need about 8–12 of these. They wrap around the center bud in overlapping rows, each one slightly offset from the last.Outer Petals
The outer petals are the showstoppers. They're larger, wider, and more open — up to 12–16 inches long for a giant rose. These are the ones that get dramatically curled backward with your heat gun to create that gorgeous, full-bloom look. For a truly giant rose (think 3–4 feet across), scale everything up proportionally. I usually work in three size increments: small (inner), medium (mid-layer), and large (outer).Step-by-Step: How to Make Foam Roses at Home
Step 1: Cut Your Petals
Trace your petal templates onto your EVA foam sheets and cut them out. For a medium-sized rose, you'll need roughly:- 1 center cone piece: About 5 inches long, teardrop shaped.
- 8–10 mid-layer petals: About 7–8 inches long, classic petal shape.
- 10–14 outer petals: About 12–14 inches long, wider and more open at the top.
Step 2: Shape the Petals with Heat
This step is the one that makes everything look real. Pick up a petal and hold it about 3–4 inches from your heat gun. Move the heat gun slowly across the surface — you'll feel the foam start to soften almost immediately. While it's warm, gently curl the top edge of the petal backward over a dowel, a marker, or even your finger. Hold it for about 10–15 seconds until it cools and holds the shape.For the outer petals, I like to curl them quite dramatically — almost a full backward curve. For the mid-layer petals, a gentler curl looks more natural. The center cone gets rolled tightly without much curl. Pro tip: Work fast but don't rush. If the foam gets too hot, it can bubble or warp in ways you don't want. If that happens, don't panic — just let it cool and try again.
Step 3: Build the Center
Take your center cone piece, add a thin line of hot glue along one long edge, and roll it tightly into a spiral. Hold it for about 20 seconds while the glue sets. This is your rose bud — the anchor for everything else.Step 4: Attach the Mid-Layer Petals
Add a small dot of hot glue to the base of your first mid-layer petal and press it against the base of your center bud. Wrap it around slightly, overlapping the bud. Add the next petal slightly offset — about one-third of the way around from the first. Keep going, overlapping each petal as you build outward. By the time you've added all your mid-layer petals, you should have something that genuinely looks like a half-open rose.Step 5: Add the Outer Petals
The outer petals go on the same way, but because they're larger and more dramatically curled, they create that full-bloom effect. Glue each one at the base, fanning them out and down as you go. Don't overthink the placement. Real roses aren't perfectly symmetrical, and yours shouldn't be either. A little asymmetry actually makes it look more natural and beautiful.Step 6: Create a Base (and Optional Stem)
Cut a circle of 6mm EVA foam slightly smaller than the diameter of your finished flower. This becomes the base that holds everything together and gives you something to attach a stem to. Glue the outermost ring of petals to the top of this base circle. If you're adding a freestanding stem, push your bendable pipe stem through the center of the base and secure it with a generous amount of hot glue.Painting and Finishing Your Foam Rose
Base Coat First
Apply a thin, even base coat of your main color using a foam brush. Don't glob it on — thin coats dry faster and look smoother. Let it dry completely (about 15–20 minutes) before adding a second coat.Add Depth with Shading
Real roses aren't one flat color. The inner petals are darker; the outer edges are lighter. Mix a slightly darker shade of your base color and use a dry brush to shade the base of each petal. Then use a lighter shade (or mix in a little white) to highlight the curled edges. This step is optional, but it takes your flower from "cute craft project" to "wait, is that real?"For more detail on getting perfect paint finishes on foam, check out Your Guide to Flawless Foam Board Paint Finishes — it's one of my most popular posts for a reason.
Finishing Touches
Once your paint is fully dry, you can add:- Glitter or Metallic Powder: Brush it lightly over the petal edges for a magical, ethereal look. Perfect for weddings and quinceañeras.
- Spray Sealant: A light coat of clear matte or satin spray sealant protects the paint and gives the petals a more realistic finish.
- Ribbon or Greenery: Wrap the stem in floral tape or ribbon and add a few foam leaves for a complete look.
Foam Rose Size Guide: What Size Should You Make?
| Rose Size | Diameter | Best For | Approx. Material Cost |
|---|---|---|---|
| Small | 10–14 inches | Table centerpieces, clusters, wall art | $5–$10 |
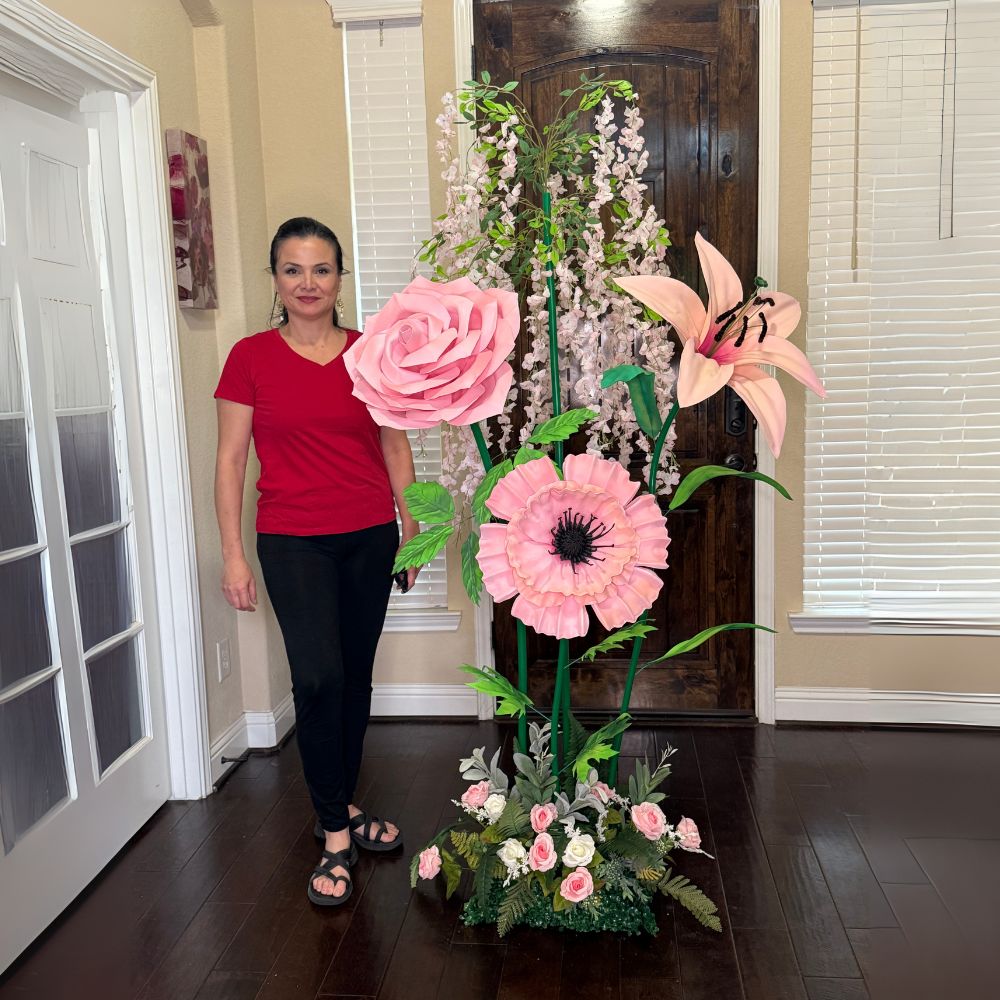
| Medium | 18–24 inches | Backdrops, photo walls, party entrances | $10–$20 |
| Large | 30–36 inches | Wedding arches, freestanding statements | $18–$35 |
| Giant | 48–60 inches | Commercial displays, event focal points | $30–$55 |
If you're building a backdrop or arch, I always recommend mixing sizes. A combination of large and medium roses with a few smaller ones tucked in between looks so much more lush and professional than all one size. For more inspiration, check out DIY Giant Flower Backdrop for Photos: Easy Guide.
Common Mistakes (And How to Avoid Them)
- Using foam that's too thick for petals: Anything over 6mm gets really hard to curl and shape. Stick to 2mm–4mm for petals. Save the thicker foam for bases and structural elements. Check out A Crafter's Guide to Every Type of Foam for Giant Flowers for a deep dive on foam types.
- Rushing the heat shaping: If you move too fast, your petals cool before they hold their shape. Work with one petal at a time and let each one fully cool before moving on.
- Using too much glue at once: Hot glue strings are the enemy of a clean-looking flower. Use small, precise dots of glue and work quickly. A low-temperature glue gun gives you a few extra seconds to position things before the glue sets.
- Skipping the base coat: Painting directly onto raw EVA foam without a proper base coat can look patchy. Always do at least two thin coats of your base color before adding shading or details.
- Making all petals the same size: This is the #1 reason foam roses look fake. Real roses have variation. Cut your petals in at least three different sizes and don't stress about making them perfectly identical.
Creative Ways to Display Your Foam Roses
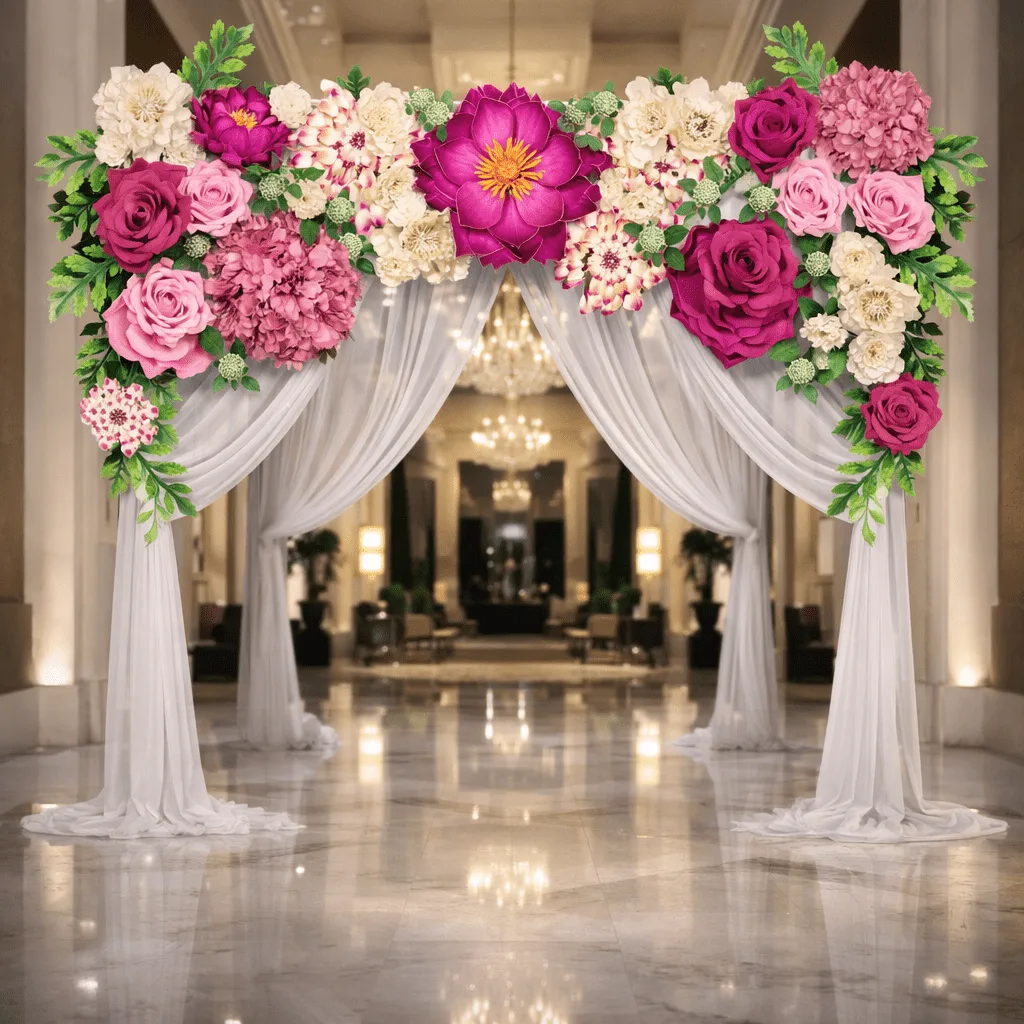
For weddings, foam roses are absolutely magical on arches and ceremony backdrops. According to The Knot, oversized floral installations are consistently one of the top wedding decor trends. Pair your foam roses with fabric blooms and greenery for a lush, layered look. Our post on Giant Foam Flowers for Wedding Arch has tons of inspiration.
For kids' parties, a cluster of medium foam roses in pastel colors as a photo backdrop is absolutely adorable. Parents go wild for it. If you're planning a baby shower, don't miss 10 Welcome Board Backdrop Ideas for a Baby Shower Entrance — it's packed with ideas.
And if you're a small business owner or event planner, foam roses on a wall-mounted panel create a stunning, reusable display that pays for itself after one event. According to IBISWorld, the US event planning industry generates over **$5 billion annually** — and visual impact is everything in that space.
When to Use a Pre-Cut Kit Instead of Starting from Scratch
Our kits at Amazing Giant Flowers come with every petal already cut to size, plus video tutorials that walk you through the whole assembly process. You skip the template-making and cutting phase entirely and jump straight to the shaping and assembling — which, honestly, is the most fun part anyway. According to a Statista report, the global DIY crafts market is expected to reach **$50.9 billion by 2024**, driven largely by people who want the creative experience without the steep learning curve. Our kits are designed exactly for that sweet spot.
We ship nationwide, and our bundle kits (which include 8–12 flowers starting at $350) are especially popular with event planners and DIY brides who want professional results without the professional price tag.
Frequently Asked Questions
How long does it take to make a foam rose at home?
For your very first foam rose, set aside about 2–3 hours. That includes cutting, shaping, and assembling. Once you've done it a few times, you can knock out a medium-sized rose in about 45–60 minutes. The more you make, the faster you get — I promise.
What is the best foam for making roses?
EVA foam (ethylene-vinyl acetate) is hands-down the best material for foam roses. It's lightweight, flexible, easy to cut, and responds beautifully to heat shaping. For petals, use 2mm–4mm thickness. For structural bases, go with 6mm or thicker. Avoid craft foam (the thin, spongy kind you find in dollar stores) — it doesn't hold its shape well and tears easily.
Can I make foam roses without a heat gun?
Yes! A hair dryer on its highest heat setting works well for shaping EVA foam petals. It takes a little longer and you have less precision, but it absolutely gets the job done. Just hold the dryer about 3–4 inches from the foam and move it slowly until you feel the foam soften, then shape it quickly before it cools.
How do I make my foam roses look more realistic?
Three things make the biggest difference: varied petal sizes, dramatic heat shaping (especially on the outer petals), and layered paint shading. A darker shade at the petal base and a lighter shade at the curled edges creates that natural depth that makes people do a double-take. A light spray of matte sealant over the finished flower also helps eliminate that "plastic" look.
How much does it cost to make foam roses at home?
A single medium foam rose (about 18–24 inches across) costs roughly $8–$20 in materials, depending on what you already have at home. Compare that to a fresh rose arrangement of similar visual impact, which can easily run $75–$200+ from a florist — and that arrangement will be wilted within a week. Foam roses last for years.
Can foam roses be used outdoors?
EVA foam is fairly weather-resistant, but prolonged direct sun exposure can cause some fading over time. For outdoor events, I recommend UV-resistant spray paint as your base coat and a UV-protective clear sealant as your finish coat. Keep them out of heavy rain if possible — while EVA foam doesn't absorb water, the hot glue joints can weaken if they get very wet.
Making foam roses at home is one of those crafts that genuinely surprises people. They start out thinking it sounds complicated, and then they finish their first flower and can't stop making them. That's exactly what happened to me, and I've never looked back. Whether you're making one rose for a birthday surprise or a hundred for a wedding installation, the process is the same — and it's genuinely joyful. If you want to skip the cutting and get straight to the creating, browse our pre-cut kits at Amazing Giant Flowers. We'd love to be part of whatever beautiful thing you're making. What are you making your first foam rose for? I'd love to know!
Ready to Create Something Amazing?
Browse our collection of giant flower kits and start your next project today.